Making cannoli cream is definitely the easier part of making cannoli. You can go all in and make the cannoli shells from scratch or you can buy some pre-made cannoli shells. You can also serve a deconstructed cannoli by making “chips” using our cannoli shell dough recipe, or you can break apart some waffle cones and use those.
Just a note about the ricotta cheese in this recipe. It’s pretty easy to make from scratch (click here for the recipe), which has a much creamier texture, or I would use the Galbani whole milk brand from the store. I’ve found any other brand to have a grainy texture in the filling.
To make the cream, combine the ricotta cheese, mascarpone, powdered sugar, cinnamon, and vanilla extract. Whip the cream (you can sweeten this if you prefer a sweeter dessert). Add the chocolate chips and whipped cream to the cheese mixture and fold it in.
Using a pastry bag, pipe the filling into the cannoli shells and dip the ends in mini chocolate chips or chopped pistachios.
The cannoli shells will soften up as the cream sits in them. To avoid a soggy shell, fill them within 1-2 hours of serving.
Cannoli Cream
From the Kitchen of Lynnae Hymas
Serves: 25-30
Prep Time: 15-30 minutes
Cook Time: NA
INGREDIENTS:
15 ounces whole milk ricotta (Galbani Brand is the smoothest or try homemade)
8 ounces mascarpone, softened
1 ½ cups powdered sugar
1 ½ teaspoon cinnamon
1 ½ teaspoon vanilla extract
1 cup whipped cream
½ cup mini chocolate chips, plus extra for garnish
Crushed pistachios for garnish
INSTRUCTIONS:
Combine the ricotta cheese, mascarpone, powdered sugar, cinnamon, and vanilla extract. Whip the cream until soft peaks form. Fold the cream and the chocolate chips into the filling. Pipe into the cannoli shells and dip the ends into mini chocolate chips or crushed pistachios. Serve within 1-2 hours of filing
I’m a little embarrassed to admit that I didn’t know what a cannoli was until about 4 years ago when my husband went on a business trip to Boston. While there, he had a little time to explore the popular tourist sites in Boston and stopped by Mike’s Pastry, a couple of times. He brought me home a cannoli, which admittedly is never as good when it’s a day old, but I was still hooked on the tasty dessert.
Mikes Pastry, Boston
After that, we discovered several bakeries in Detroit that serve really delicious cannoli and we were hooked. Whenever traveling, I always look to see if there is a good cannoli shop nearby.
Il Pirata Delle Cinque TerreMike’s Pastry, bBostonFerrara Bakery & Cafe, Little Italy, NYC
Feeling the craving yet? Unfortunately, Twin Falls, Idaho is not home to a cannoli shop. There are a couple of local restaurants that serve them, but, they are not quite the same. So….in true Hymas Family Favorites tradition, we learned how to make our own.
Start by making the dough.
Add the flour, sugar, cinnamon, and salt to a stand mixer with the paddle attachment. Mix on slow. Add the vinegar and mix until combined. Next, add the shortening. Finally, add the egg to the water, whisk, and add to the dough. Mix until combined, and then knead it for about 1 minute. The dough should be soft. Form it into a disk, wrap in saran wrap, and refrigerate for 30 minutes.
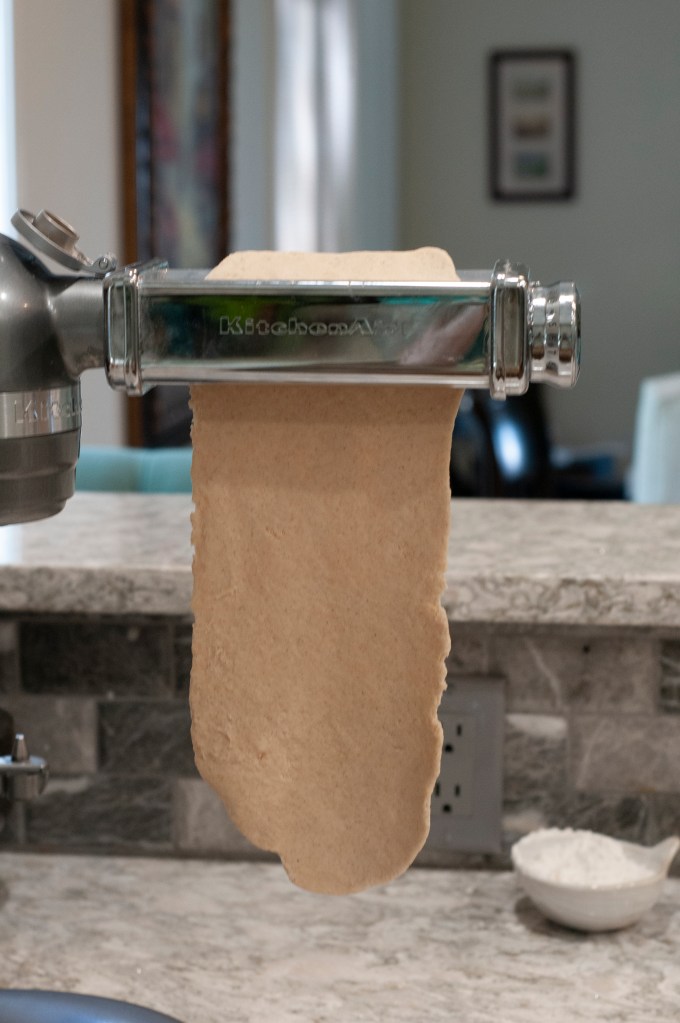
Next, take a generous piece of the dough and roll it out with a rolling pin.
The goal is to get to 1/16 of an inch. The easiest way to do that is with a pasta roller. I start on the widest setting (1) and step it down to a 3.
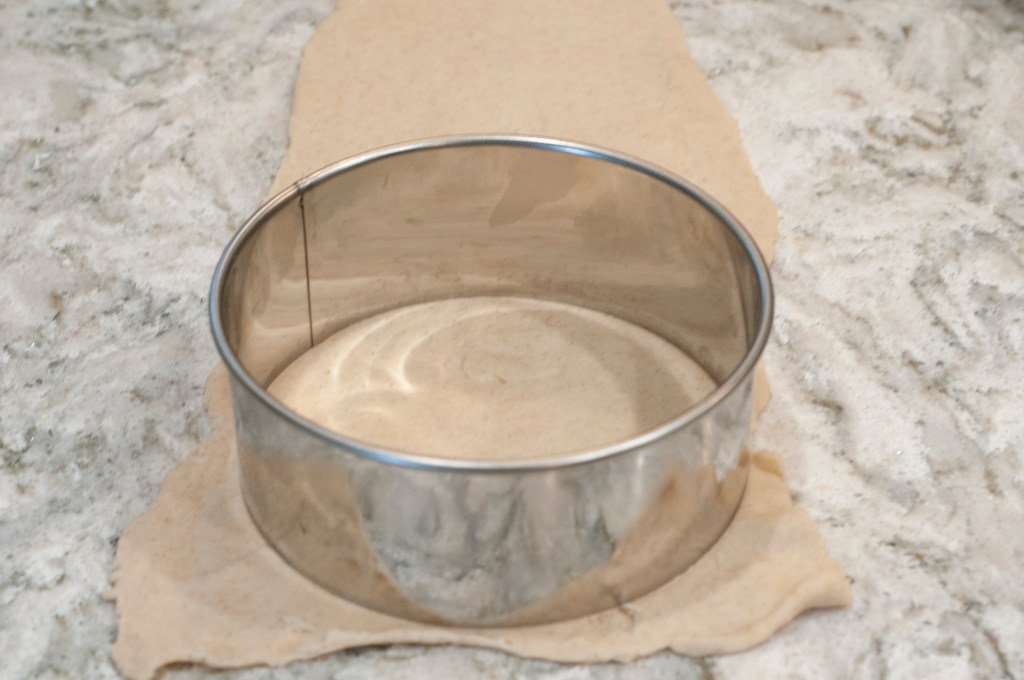
Now cut the dough with a round 3-4 inch biscuit cutter.
Pre-oil the cannoli forms and wrap the dough around the form. Dampen one edge of the dough with a wet finger and seal the dough around the form. Don’t wrap it too tightly or t will be difficult to remove after it’s finished frying. If you don’t have the forms, you can cut the dough into “chips” and serve it with cannoli cream as a deconstructed cannoli.
Put the dough on the forms into a deep fryer with the oil heated to 375 degrees. You can do this in a heavy pan on the stove top and use a thermometer, or you can use a deep fryer. I LOVE my deep fryer because it really helps to contain the mess, makes it easy to filter and contain the oil, and maintains the oil temperature for me.
The shells will need to cook for 2-4 minutes until golden brown. I start turning the shells almost immediately to minimize any hot spots. You can also turn them half way through the cooking process. When they are finished cooking, pull them out and allow them to drain for a minute. Again, the basket on the deep fryer makes this a much easier step. After they are done draining, turn them onto some paper towels to help soak up the grease.
You’ll need to get them off the forms fairly quickly. They slide off much easier when they are hot, and depending on how many forms you have, you’ll need them for the next batch. I have a total of 12 which seems to be a good number to keep the process moving while allowing time for the forms to cool off enough between batches.
They key to this is using a thin flour sack type towel. I use one end to hold the form and the other end to grab the shell and pull it off. Be careful not to burn yourself. I recommend watching the video to see the technique for this. It’s not hard, but easier to visualize than to read about how to do it.
Let the shells cool completely before filling. Here is a recipe link for the filling.
Cannoli Shells
From the Kitchen of Lynnae Hymas
Serves: 30
Prep Time: 2-3 hours
Cook Time: 2-4 minutes per batch (12-24 minutes total)
INGREDIENTS:
3 ½ – 4 cups all-purpose flour (450+ grams)
2 tablespoons sugar
1 teaspoon cinnamon
1 teaspoon salt
¼ cup shortening
1 egg yolk
1 cup water
¼ cup white vinegar
INSTRUCTIONS:
Add flour, cinnamon, sugar, and salt to stand mixer with paddle attachment on slow. Add the vinegar and mix. Add the shortening. Mix the egg yolk and water together then add to the dough, which should be soft.
Knead the dough for about 1 minute and let rest in the fridge for 30 minutes. Roll into a sheet 1/16” (pasta roller stepped down from 1 to 3). Cut into a 3-4” circle and then wrap around a pre-oiled cannoli form. Dampen one edge with water using your finger to seal the dough.
Heat the oil to 375°F and starting with the sealed side down cook each cannoli shell for 2-4 minutes until golden brown, turning occasionally throughout the cooking time.
Using a thin towel, remove the cannoli from the forms immediately and allow to cool completely. Cannoli shells may be stored in the refrigerator in an air-tight container for 1-2 months. Makes 30 shells.
Lasagna is one of those dishes that is so easy to make a double or triple batch for very little extra time. You can feed a crowd or throw an extra in the freezer for a day when all you have time to do is throw it in the oven. It’s also so great to have on hand to take dinner to a sick or mourning friend. I love to keep these on hand because they are great comfort food.
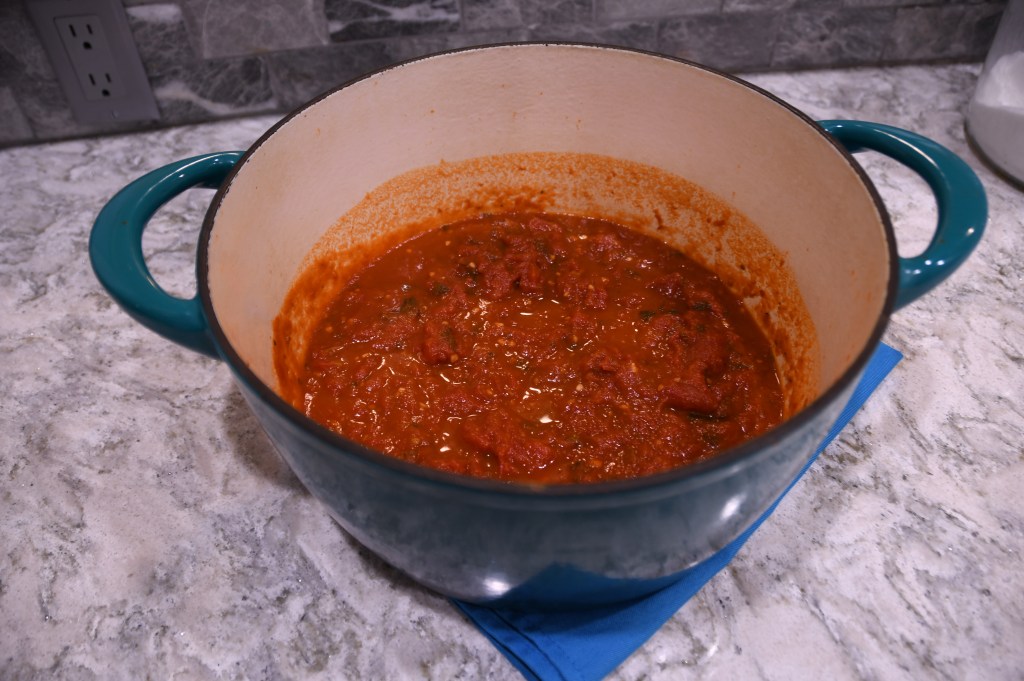
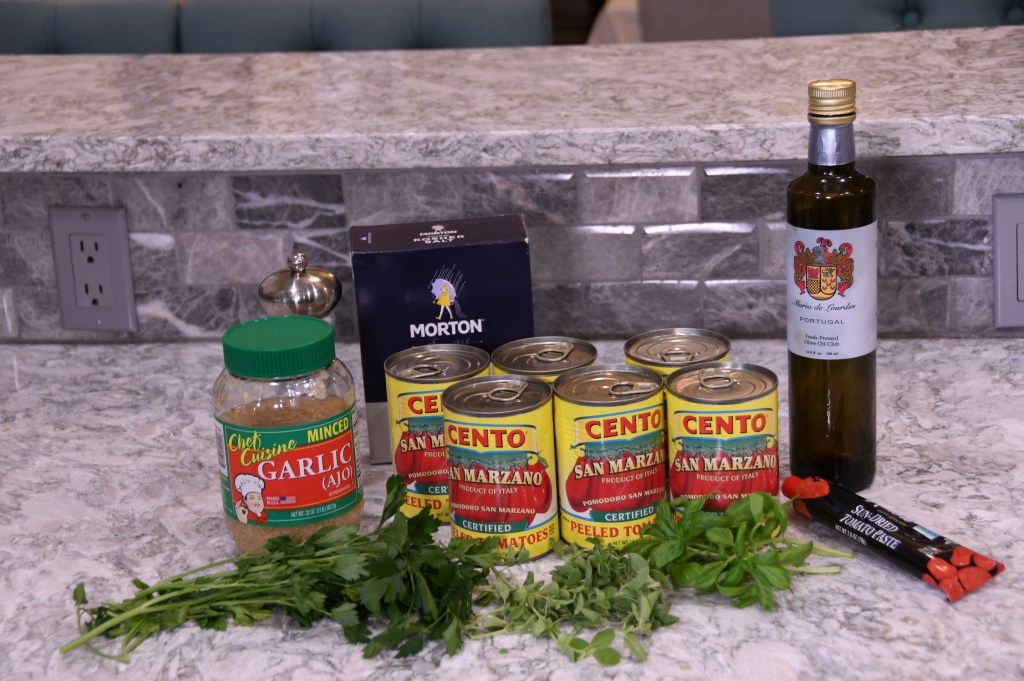
Start with a batch of tomato sauce. This does take some time to simmer on the stove top, so you make want to make the sauce the day before or the morning of.
After your sauce is ready, brown your hamburger and sausage together in a frying pan. Drain the grease and add the meat to the tomato sauce.
Next you’ll combine the cottage cheese, ricotta cheese, and egg together in a bowl. You can also add an optional 1/2 cup of freshly grated Parmesan cheese to the mix. It’ll add to the depth of flavor in your lasagna. You’ll also need a pound of grated mozzarella cheese. My preference is to buy the already grated cheese from the store for ease.
After the sauce and cheese are ready to go, the next step is assembly. Preheat your oven to 350 degrees. Start with a thin layer of sauce on the bottom of a 9×13 pan. (My preference is to use the aluminum ones because they are easy to clean up and easy to freeze. My local restaurant supply store carries them for less than $0.50 a pan, so you may want to try a store like that to get a great price on the pans.) Next, layer the noodles. My favorite are the Barilla oven ready lasagna noodles. 3 fit perfectly in the pan, AND I don’t have to boil them first. Next, layer the cottage cheese mixture, sprinkle mozzarella over that, then a thick layer of sauce. Repeat the layers of cottage cheese, mozzarella cheese, and sauce. Top it off with 1/2 cup of freshly grated Parmesan cheese.
Bake for 45-60 minutes. If you are baking a frozen lasagna, plan an additional 1-1 1/2 hours baking time.
Allow the lasagna to stand for 10 minutes before cutting into it. This allows it to set up a bit and keep the layers from running all over the plate.
Lasagna
From the Kitchen of Lynnae Hymas
Serves: 8-12
Prep Time: 30 min
Cook Time: 45-60 min
INGREDIENTS:
1 recipe of tomato sauce
1 pound hamburger
½ pound pork sausage
2 cups cottage cheese
1 cup ricotta cheese
2 eggs, beaten
6 oven ready lasagna noodles
1 pound grated mozzarella cheese
½ cup freshly grated Parmesan cheese (optional: extra ½ cup of Parmesan cheese)
INSTRUCTIONS:
In a large skillet over medium-high heat, sauté the hamburger and sausage until brown. Drain off the excess fat. Add to the tomato sauce.
Grate the mozzarella cheese and set aside. In a medium bowl, combine the cottage cheese, ricotta cheese, optional ½ cup of Parmesan cheese, and the eggs, and stir together well.
Preheat the oven to 350 degrees F.
To assemble the lasagna: put a small amount of sauce in the bottom of a 9×13 baking pan to prevent sticking. Layer 3 lasagna noodles on top of the sauce. Spoon half the cottage cheese mixture onto the noodles; spread to distribute evenly. Sprinkle half the mozzarella on top of the cottage cheese mixture. Spoon just under half the meat mixture on top of the mozzarella, and spread evenly, being careful not to disrupt the layers below. Now repeat the process, beginning with a layer of lasagna noodles, followed by the cottage cheese mixture, followed by the mozzarella, and ending with a thick layer of the meat mixture. Sprinkle the Parmesan over the top.
Bake until the lasagna is hot and bubbly, 45 to 60 minutes. Allow to stand 10 minutes before cutting into squares.
Helpful Hint: Lasagna can be fully assembled and frozen, unbaked! I double the sauce and cheese and get 3 9×13 pans of lasagna. You can also make this a day or two ahead and keep refrigerated until you are ready to bake.
If you’ve ever eaten at the Old Spaghetti Factory, you may have tried their browned butter with mizithra cheese spaghetti. I LOVE it, but I live no where near an Old Spaghetti Factory, SOOOO, I have to make it at home whenever I get the craving. It’s actually super easy to make and kids love it. Win, win, win!
You need 3 ingredients for this dish–spaghetti (prepare spaghetti according to package directions, or make your own pasta to kick things up a notch), butter, and mizithra cheese. I find mizithra cheese at our local Winco grocery store here in Twin Falls, ID, so I’m pretty sure it’s not too hard to find.
1 cube of butter serves about 4 people. Using a medium sauce pan, melt your butter over medium to medium high heat, stirring constantly so your butter doesn’t burn. It will only take a few minutes from the time the butter melts to the time it turns into a caramel brown color. It will also give off a caramel smell. As soon as you reach this point, remove the butter from the heat. I like to strain it to remove the solids that will form.
From here, it’s easy peasy. Put the pasta on a plate and top with butter and grated mizithra cheese. ENJOY!
1 ½ tablespoons fresh oregano (or 1 ½ teaspoons dried oregano)
2 tablespoon fresh parsley (or 2 teaspoons of dried parsley)
2 tablespoons extra virgin olive oil
INSTRUCTIONS:
Sauté the garlic in olive oil over medium heat for 30-60 seconds, stirring constantly. Add the San Marzano tomatoes, tomato paste, and salt and pepper to the garlic. Mix, cover, and simmer on low heat for 4-6 hours, stirring occasionally to keep the bottom of the pan from burning. The tomatoes will break down as it cooks. If you prefer an even smoother tomato sauce, you can use an immersion blender to puree the sauce.
After the sauce has finished simmering, add the basil, oregano, and parsley. Adding them at the beginning will result in a bitter tasting sauce. Serve with your favorite pasta or use as a sauce for lasagna or parmesan chicken.
Pasta is the quintessential Italian dish. There are so many varieties of pasta, and there are few dinners that are easier than opening a box of pasta and throwing on some sauce. But, if you want to take a simple Italian dinner to the next level, homemade pasta will knock it out of the park
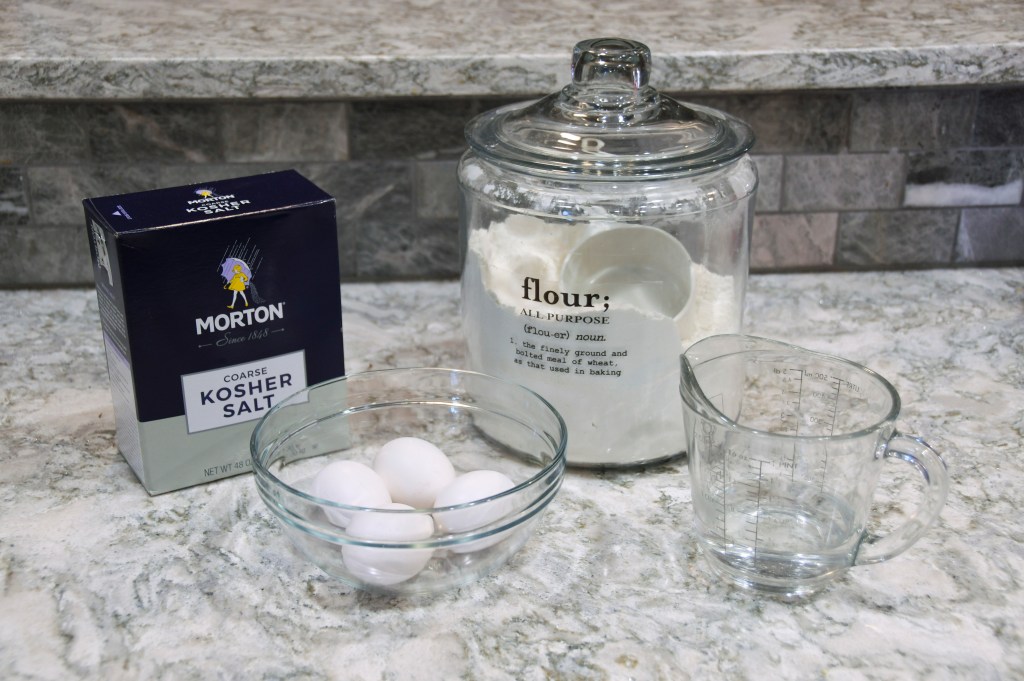
The ingredients for pasta are simple—flour, eggs, salt, and water.
You start by combining together the flour and the salt. You can do this in a bowl, or straight on the countertop. Then, make a well in the center of the flour. Whisk your eggs together, then pour them into the well you made.
Using a fork, start grabbing a little flour at a time and incorporate it into the egg until it’s all combined. Your dough will likely be pretty dry and crumbly.
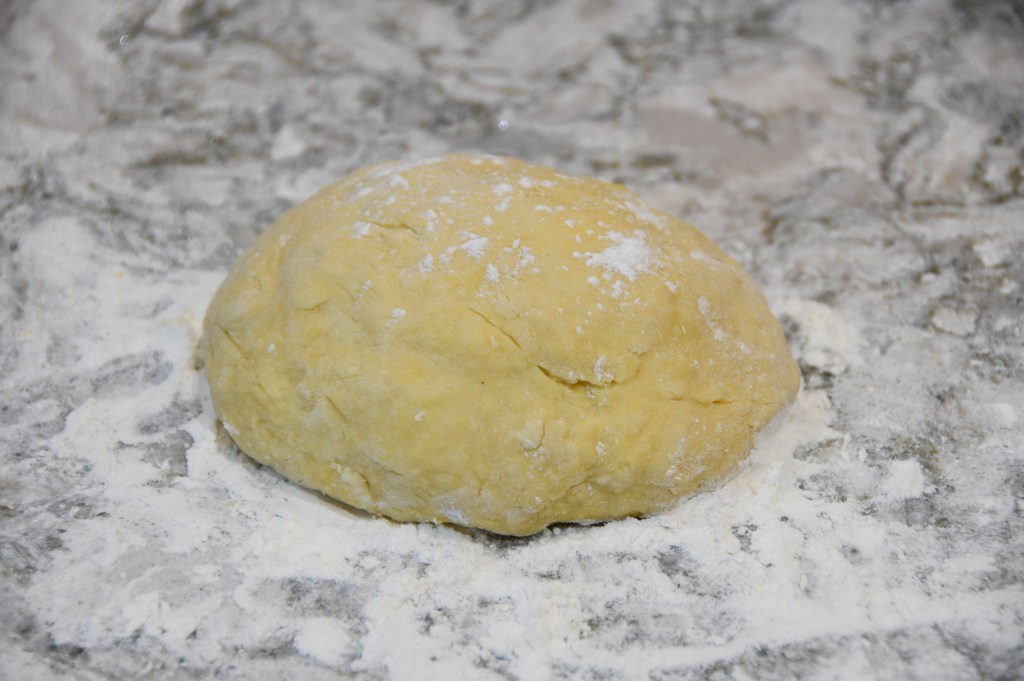
Start kneading the water to the dough, about a tablespoon at a time. Keep adding the water until the dough comes together to form a non-sticky, soft dough. If the dough becomes sticky, no worries. Just incorporate a small amount of flour until it comes together.
After the dough is kneaded and mixed, form the dough into a disk and wrap it in seran wrap. It needs to rest in the fridge for at least 20 minutes. It can rest up to 24 hrs.
The next step is to roll it out. Taking a golf ball size piece of dough, dredge it in flour, and roll it unto a rough rectanglular shape. Now it’s ready for a pasta maker. Put the rollers on and put it on the widest setting. Run the dough through the roller. You may have to do it twice on the widest setting, depending on how thin you rolled the dough to begin with. If the dough starts to get sticky, dredge it in flour as needed. Now start stepping the roller to thinner and thinner settings, passing the dough through the roller each time, until the dough gets to your desired thickness. I usually step mine from a 1 down to a 4.
When you are finished with that piece, coat both sides of the dough in flour to keep it from sticking to itself and set it aside while you roll out the remaining pieces of dough.
Now that your pasta is rolled, it’s time to cut. You can do this by hand, making rustic noodles, or you can use a pasta cutting attachment on your pasta machine. Today, I’m using the spaghetti attachment. Run the dough through the cutter and then set aside while cutting the other pieces. If the pasta is not well coated in flour before you cut, it will stick together.
Bring a pot of water to a boil. Generously salt the water and add 2-3 tablespoons of olive oil. Add the pasta to the boiling water and cook for 2-3 minutes. Drain the pasta and add your favorite sauce.
Homemade Pasta
From the Kitchen of Lynnae Hymas
Serves: 4-6
Prep Time: 1 hour + 20 minutes resting
Cook Time: 2-3 minutes
INGREDIENTS:
3 cups all-purpose flour
4 eggs
1 ½ teaspoons salt
¼ cup water
Salt
Extra virgin olive oil
INSTRUCTIONS:
Combine the salt and the flour in a bowl. Make a well in the center of the flour. Whisk the eggs to combine and then pour the eggs into the well. Using a fork, pick up a little flour at a time while combining the eggs and the flour together. Turn the mixture onto the countertop. Add the water, 1 tablespoon at a time, and knead it into the dough. When the dough all comes together without being sticky, the dough is ready. You may not need all the water. If the dough gets sticky, you can knead a little flour at a time into the dough until it is no longer sticky. Form it into a disk, wrap it in plastic wrap, and rest it in the refrigerator for at least 20 minutes up to overnight. Remove from the refrigerator and remove the plastic wrap. Pull off a golf ball sized piece of dough and roll it into a rectangular shape. Dredge the dough in flour. Run the dough through the pasta machine roller, stepping it down from the thickest setting until you reach the desired thickness. Coat the dough with flour again to prevent the dough from sticking to itself. Cut the pasta. This can be done by hand into rustic noodles, or with the pasta maker into the desired type of pasta. Bring a pot of water to a boil. Generously salt the water and add a few tablespoons of olive oil. Add the pasta to the boiling water. Boil for 2-3 minutes. The pasta should rise to the top when finished cooking. Drain the pasta and serve with your favorite sauce.
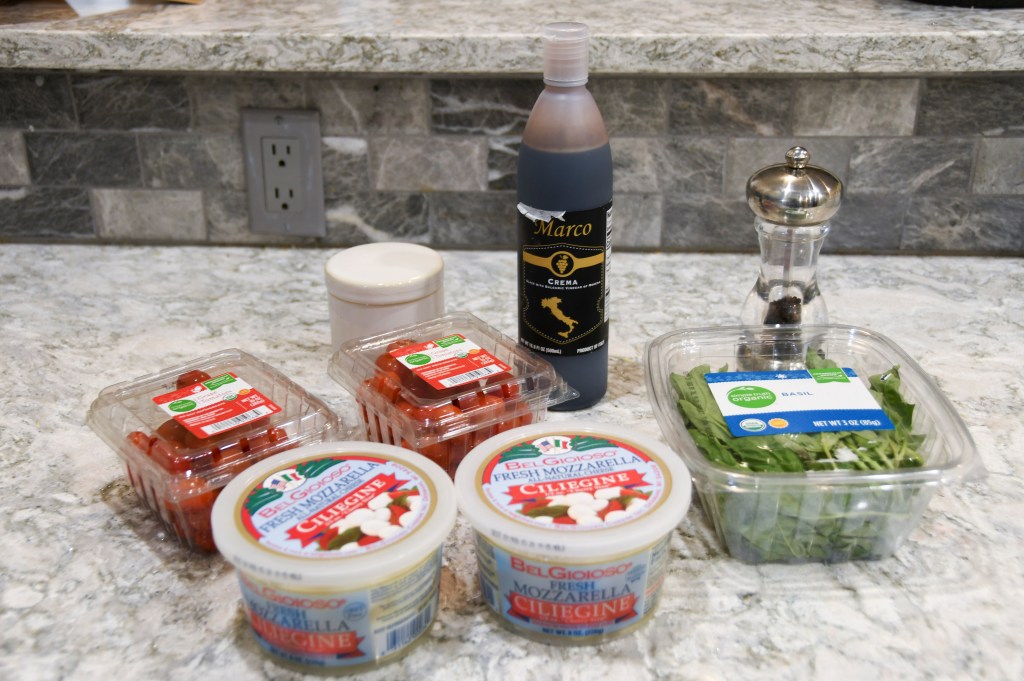
This simple salad is light and refreshing and is a great compliment to any Italian meal.
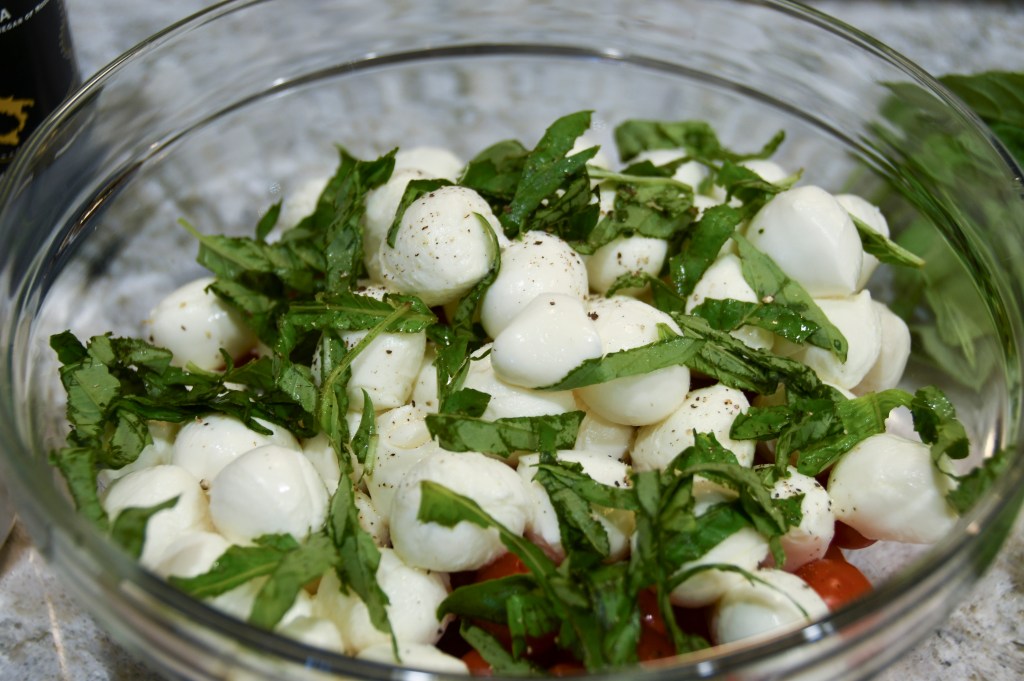
First you’ll need to drain your fresh mozzarella balls. I like to use Ciliegine sized mozzarella, but you could also use pearls. Rinse and drain your tomatoes. Grape tomatoes work well with this salad both because of their size and their sweet flavor.
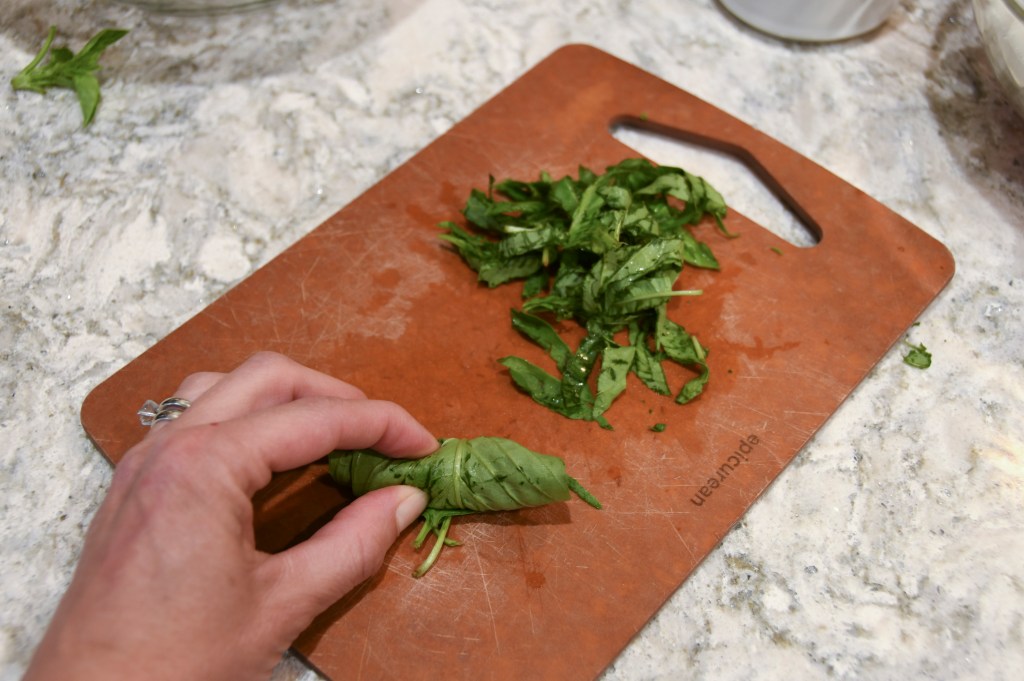
Next you’ll want to add a chiffonade of basil to the bowl. You slice the basil by stacking it, rolling it into a tight pinwheel, and then slicing it into thin strips. The sharper the knife and quicker your slice, the less bruised your basil will be. Clearly, my knife could use some sharpening.
Add the basil and salt and pepper to taste. I also like to add a little bit of olive oil, but this is optional. Toss to combine.
Finally, finish the salad by drizzling it with Balsamic glaze. You can make your own by reducing Balsamic vinegar on the stove top, but I like to buy a glaze or a cream, which is readily available at my local grocery store. I toss the salad and then finish it with a little more glaze on top.
Drain the ciliegine mozzarella using a strainer. Add them to a bowl. Add the grape tomatoes. Rinse off the fresh basil leaves. Roll the leaves into a tight pinwheel and then slice into thin strips or a chiffonade. Add these to the salad. Add salt and pepper to taste and then drizzle 2-3 tablespoons of olive oil over the salad. Give it a toss to combine all the ingredients. Next drizzle the balsamic vinegar glaze over the salad. Toss again. Finish off with a decorative drizzle of the balsamic glaze on top.
I love ricotta cheese. It is really versatile. You can use it in desserts, breakfasts, Italian dishes, spreads… I do find that the texture and the cheese can be a little dry. When I make cannoli, I have always used a particular brand of whole milk cannoli because it has a more creamy texture.
I recently found just how easy it is to make homemade ricotta cheese. I was so excited because I have so much more control over the consistency and texture of the cheese to better match the dish I’m making. Plus the fresher the better.
The equipment you need to make ricotta is a heavy sauce pan, a fine mesh strainer, and some cheese cloth. For ingredients, you need milk, cream, salt, and vinegar or lemon juice. That’s it!
You make the base of the cheese by combining the milk, cream, and salt in a heavy sauce pan and bring it to a rolling boil over medium high heat. Then, add your acid and let the milk curdle. It takes about 1-5 minutes. Finally, pour the mixture into a cheese cloth lined fine mesh strainer resting in a bowl. The whey will separate out, leaving the cheese behind. Drain until it reaches your desired consistency. You can speed up the process by twisting the cloth together and providing a little bit of pressure.
INGREDIENTS:
3 ½ cups milk
2 ½ cups cream
1 teaspoon salt
3 tablespoons white wine vinegar or lemon juice
EQUIPMENT:
Cheese cloth
Fine mesh strainer
INSTRUCTIONS:
Add milk, cream, and salt to a heavy pot and bring to a rolling boil. Remove from heat and add the vinegar or lemon juice. Mix together. The mixture will start to curdle. Allow the mixture to sit for 1-5 minutes. Put your strainer in a bowl and line it with a 2-4 layers of cheese cloth. Carefully pour your milk mixture into the cheese cloth and allow to drain until you reach the desired consistency, about 30-60 minutes. You can cool in the refrigerator or use immediately.