Freezer Meal

Mac ‘n Cheese

When I think of comfort food, one of the first foods I think of is mac ‘n cheese. In Clarkston, Michigan, there are a couple of restaurants, Clarkston Union and Union Woodshop, who serve the world’s best macaroni and cheese. Seriously. If you are a local or the next time you visit the Detroit area, GO. It’ll be worth the effort. Since we don’t live there anymore, we had to learn to make our own version, and it’s pretty darn good.

First, you’ll need to boil the pasta. I use penne. After boiling a pot of water, I heavily salt the water and then add the pasta. I follow the package directions for cooking the pasta, but you want to cook on the short end of the recommended time so it’s still el dente, usually about 7-8 minutes. Drain and set aside.

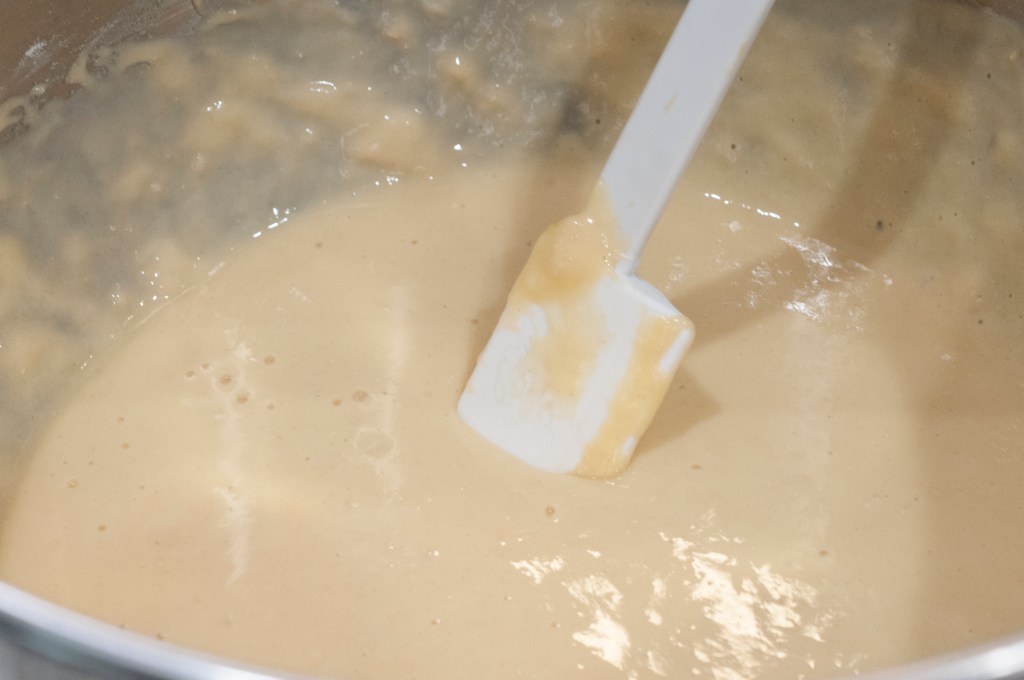
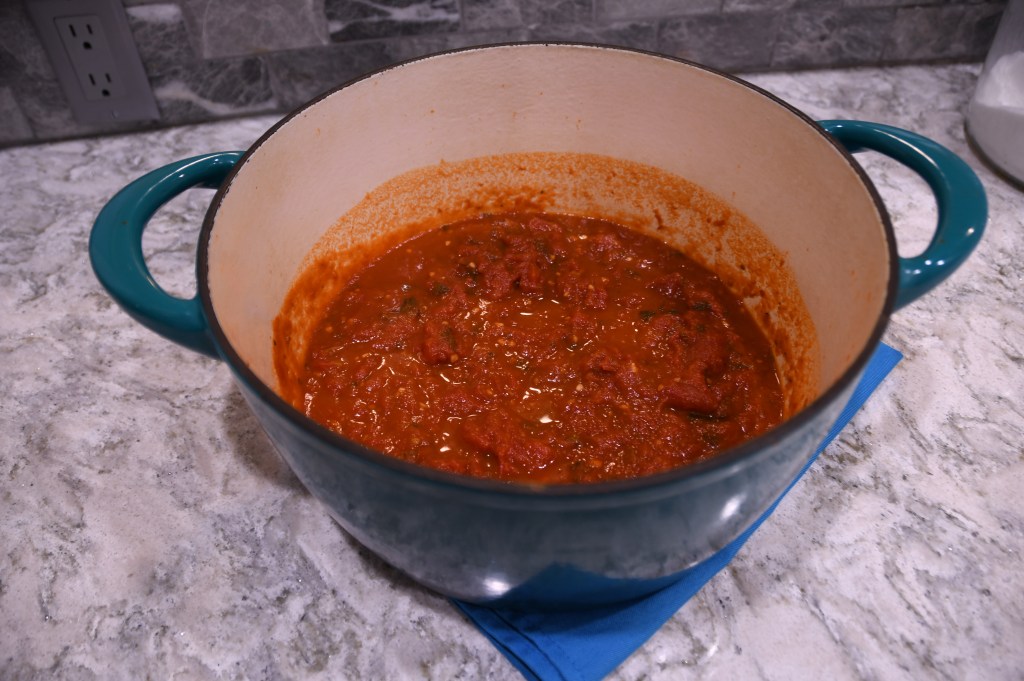
Next, melt the butter in another heavy pot and then mix in the flour to form a roux. Cook the roux for about another minute. Next add the half-n-half. If you’d like, you can heat the up a little in the microwave or in another pan to speed up the cooking time. Add the salt, onion powder, garlic powder, nutmeg, cayenne pepper, and black pepper. Warm the mixture until it just starts to bubble, then add the parmesan cheese. Stir until the cheese is melted.

Add the pasta to the sauce. There will be a lot of sauce compared to the pasta.

You can use lots of different types of containers to bake the mac n cheese. You can use individual ramekins, casserole dishes, and even tin foil pans to freeze and bake later. This also makes a large amount, so it’s easy to split it into two meals or even double the recipe and make some freezer meals.

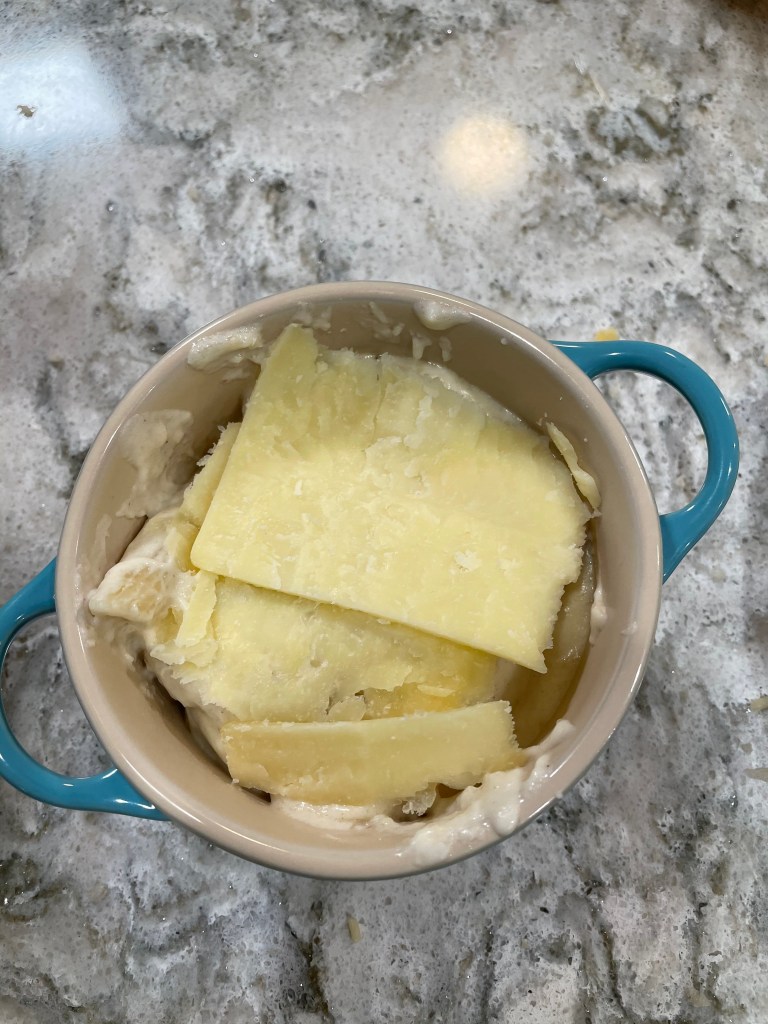
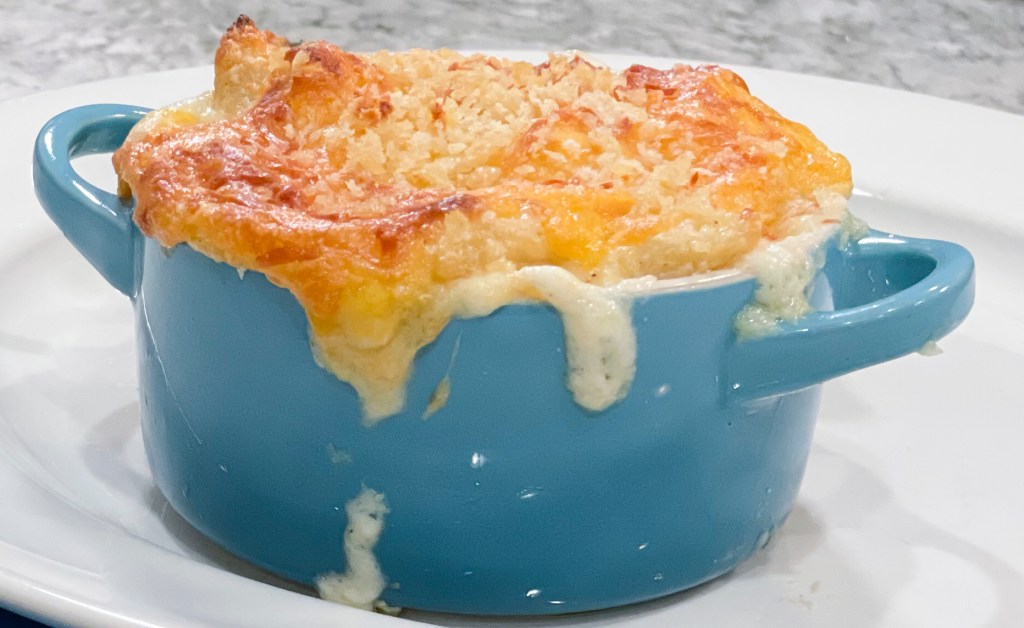
Fill the baking dish half way with mac ‘n cheese. Put a layer of cheese slices down, the more sharp the better. Finish filling the baking dish with mac ‘n cheese. Top it off with grated cheddar, parmesan, and panko bread crumbs.

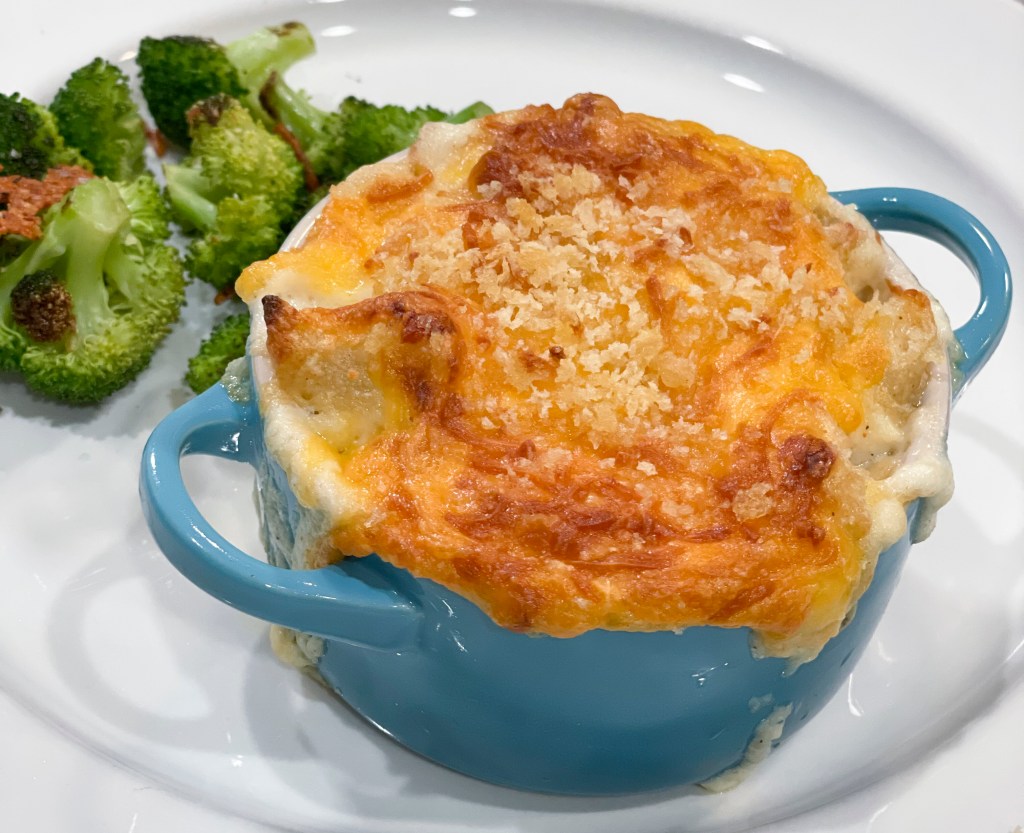
Bake at 375 degrees for about 30 minutes or until the top is golden brown and the edges are bubbling. Serve immediately (or you can let it cool for 3-5 minutes first).

Homemade Mac ‘N Cheese

From the Kitchen of Lynnae Hymas

Serves: 6-10Prep Time: 1- 1 ½ hoursCook Time: 30 minutes

INGREDIENTS:

  • 1-pound penne pasta
  • 6 cups half and half (or 4 cups 2% milk and 2 cups heavy cream)
  • ¼ teaspoon nutmeg
  • 2 teaspoons salt
  • ¼ teaspoon black pepper
  • ¼ teaspoon cayenne pepper
  • ¼ teaspoon onion powder
  • ¼ teaspoon garlic powder
  • 1 stick butter
  • ½ cup flour
  • 4 ½ cup Parmesan cheese, divided (freshly grated)
  • 8 slices extra sharp cheddar cheese (Pinconning is best if you can find it)
  • 1 ½ cup shredded cheddar cheese
  • ½ cup panko breadcrumbs

INSTRUCTIONS:

Boil the penne pasta in a pot of heavily salted water until al dente according to package directions, about 7-8 minutes. Drain the water and allow to cool.

In a large heavy pot, melt the butter over medium-high heat. Add flour to butter slowly while whisking to make a roux. Cook roux for one minute, whisking until smooth.  Slowly add the half and half, stirring until the mixture is smooth and the sauce has thickened.  Add the nutmeg, salt, black pepper, cayenne pepper, onion powder, and garlic powder.  Heat over medium-high heat until the mixture is bubbling on edges, stirring occasionally.  Slowly stir in 4 cups of Parmesan cheese and cook for 5-10 minutes until completely melted.

Pre heat the oven to 375°F.  Add the pasta to the sauce mixture and gently fold them together.  In a baking dish layer 1/2 of pasta and sauce mixture. Place cheddar cheese slices on top and then cover with the remaining pasta and sauce mixture. Top with shredded cheddar cheese, 1/2 cup of Parmesan cheese, and panko breadcrumbs. Cook for 30 min or until the top is browned and the edges are bubbling. 

Apples, Dessert

Katie’s Brown Bag Apple Pie

My sister-in-law Katie’s brown bag apple pie is full of the flavors of home. It’s everything an apple pie should be–flaky crust, simple ingredients, cinnamon, apples, crumb topping… Serve it a la mode, and it’s a grand slam home run! This pie comes together fast, but does take a while to bake. But it’s oh so worth the wait.

You’ll need flour, sugar, salt, cinnamon, butter, oil, milk, and APPLES–good pie apples, crisp and no too sweet. I used Braeburn apples for this pie.

Add the flour, salt, and sugar to the pie tin and mix to evenly distribute the dry ingredients.  Add milk and oil and mix together.  Press the crust into the bottom and sides of the tin.

I used the Pampered Chef apple, peeler, corer, slicer to peel and slice the apples. You can buy a tool like this at almost any kitchen store. It definitely speeds up the process. Toss the sugar, cinnamon, and flour with the apple slices in a bowl.  Fill the pie crust with the apples, pressing down on them to fit them all in.

Using a pastry blender, combine the butter, sugar, and flour together into a crumblike consistency. Pack the topping onto the apples.

Put the pie in a brown paper grocery size bag on it’s side and staple it shut.

Bake at 350 degrees for 1 hour 45 minutes.

Serve warm. With vanilla ice cream. You’re welcome.

Brown Bag Apple Pie

From the Kitchen of Katie Hymas

Serves: 6-8Prep Time: 30-45 minCook Time: 1 hr 45 min

Crust

  • 1½ cups flour
  • 1 teaspoon salt
  • 1½ teaspoons sugar
  • 2 tablespoons cold milk
  • ½ cup oil

Mix the dry ingredients together in the pie tin.  Add milk and oil and mix together.  Press the crust into the bottom and sides of the tin.

Filling

  • 6-7 apples, peeled and sliced
  • ½ cup sugar
  • ½ teaspoon cinnamon
  • 2 tablespoons flour

Toss the sugar, cinnamon, and flour with the apple slices.  Fill the pie crust with the apples.

Topping

  • ½ cup flour
  • ½ cup butter softened
  • ½ cup sugar

Combine with the pastry blender and sprinkle over top of pie.  Place pie in brown paper bag.  Staple it shut. Bake at 350° for 1 hour 45 minutes.

Apples, Drink

Apple Cider

Two things have kept me very busy this last month. One of them is apple cider. 25 gallons of apple cider. Our tree gave us so many apples this year! We stopped at 25 gallons, but there were still so many apples left. I still hope to post an apple recipe or two. In the meantime, here is a video about how we juiced our apples this year.

We used a Breville juicer that we bought specifically for our apple cider this year. It is a great machine, BUT not designed to juice quite so many pounds of apples. It took several days for us to juice all our apples. But we now have lots of apple cider to get us through the cold winder.

Breakfast

Stuffed French Toast

Anyone who know me knows how much I love to go to Disneyland. One of my favorite places to eat is Steakhouse 55 in the Disneyland Resort Hotel. For breakfast, they serve a stuffed French toast that is to die for. Since Disneyland is currently closed, we had to come up with our own version at home.

Steakhouse 55’s Stuffed French Toast

This french toast is NOT a quick and easy meal. In fact, you’ll want to make as much of it ahead of time as you can. I like to make the custard, and maybe even the filling, the day before.

Whisk the eggs in a bowl. Make the custard by combining the cream, sugar, and vanilla beans.  Bring to a simmer over medium heat and whisk until the sugar is dissolved.  Temper the eggs by slowly adding a ladleful of the cream mixture while whisking.  Add another ladle full of cream and whisk.  Slowly pour the remaining cream into the egg mixture, whisking to combine.  Cool to room temperature. The custard can be made the night before and stored in the refrigerator.

Slice a loaf of brioche bread into 3-4 slices. Use a paring knife to make a small slit on the side of each slice of bread.  Arrange the bread in a 9×13 pan and cover with the custard.  Soak for 1 hour.  Preheat the oven to 350 degrees.  Put the bread in a clean 9×13 pan and bake 45-55 minutes or until golden brown.  Remove from the oven and allow to cool.

While the toast is baking, make the filling.  In a medium bowl, combine the mascarpone, ricotta, strawberries, sugar, and vanilla.  Beat with an electric mixer until fully combined.  Transfer to a piping bag with a large round tip.  Chill until ready to use.

In a separate bowl, combine the strawberries, lemon juice, sugar, lemon zest, and blueberries.  Allow to stand for 10 minutes.  This will allow the juices from the strawberries to come out. Add the maple syrup and mix to combine.

Next, whip the cream. Add the cream, sugar, and vanilla to a separate bowl and whip with a hand mixture until soft peaks form.  You can also use a high-speed blender to whip the cream.

Pipe the ricotta and cheese mixture into the slit in the slices French toast.  Optional: sprinkle the top of the French toast with sanding sugar and melt the sugar with a kitchen torch.  Top with the fruit mixture and the whipped cream.  Garnish with a mint leaf if desired.

Hymas Family Favorites French Toast

Stuffed French Toast

From the Kitchen of Lynnae Hymas

Serves: 4-6Prep Time: 3-4 hoursCook Time: 45-55 minutes

INGREDIENTS:

Custard

  • 1-2 loaves of brioche bread, cut into 4-6 slices
  • ½ cup granulated sugar
  • 4 cups heavy cream
  • 1 vanilla bean, seeds scraped
  • 3 eggs

Filling 

  • ¾ cup mascarpone cheese, softened
  • ¾ cup ricotta cheese
  • ¾ cup strawberries, quartered
  • ¼ cup powdered sugar
  • 1 teaspoon vanilla

Strawberry Topping

  • 1 tablespoon granulated sugar
  • 2 cups strawberries
  • 1 lemon, zested and juiced
  • 1 cup blueberries
  • ½ cup real maple syrup

Whipped Cream

  • 1 cup heavy cream
  • 2 tablespoons granulated sugar
  • ½ teaspoon vanilla extract

Assembly

  • ½ cup sanding sugar (optional)
  • Fresh mint leaves (optional)

INSTRUCTIONS:

To make the French toast, using a paring knife make a small slit on the side of each slice of toast.  Make the custard by combining the cream, sugar, and vanilla beans.  Bring to a simmer over medium heat and whisk until the sugar is dissolved.  Temper the eggs by adding them to a large bowl, and slowly adding a ladleful of the cream mixture while whisking.  Add another ladle full of cream and whisk.  Slowly pour the remaining cream into the egg mixture, whisking to combine.  Cool to room temperature.  The custard can be made the night before and stored in the refrigerator.

Arrange the bread in a 9×13 pan and cover with the custard.  Soak for 1 hour.  Preheat the oven to 350 degrees.  Put the bread in a clean 9×13 pan and bake 45-55 minutes or until golden brown.  Remove from the oven and allow to cool.

While the toast is baking, make the filling.  In a medium bowl, combine the mascarpone, ricotta, strawberries, sugar, and vanilla.  Beat with an electric mixer until fully combined.  Transfer to a piping bag with a large round tip.  Chill until ready to use.

In a separate bowl, combine the strawberries, lemon juice, sugar, lemon zest, and blueberries.  Allow to stand for 10 minutes.  Add the maple syrup and mix to combine.

Add the cream, sugar, and vanilla to a separate bowl and whip with a hand mixture until soft peaks form.  You can also use a high-speed blender to whip the cream.

Pipe the ricotta and cheese mixture into the slit in the slices French toast.  Optional: sprinkle the top of the French toast with sanding sugar and melt the sugar with a kitchen torch.  Top with the fruit mixture and the whipped cream.  Garnish with a mint leaf if desired.

Breads

Brioche

I love the smell of freshly baked bread in the house. One of the most complicated and delicious breads that I’ve made is brioche. The magical ingredient in brioche is BUTTER!!!! And, the key to a good loaf of brioche is a strong gluten development, which means A LOT of time in the mixer kneading.

The ingredients are simple: all-purpose flour, butter, eggs, salt, yeast, sugar, and water. And you start by making a sponge, which is a way to give the yeast a head start. Put 3 cups of flour, yeast, water, and eggs in a mixing bowl.   Beat on medium speed with the paddle attachment until the batter is smooth. Cover it and let it sit for 45 minutes.  The mixture will develop a few bubbles.

Add the remaining 2 cups of flour, the sugar, and salt.  Beat until the dough cleans the side of the bowl and becomes shiny and elastic.  It will take 8 to 10 minutes. 

Now comes the unusual part. While the dough is mixing, flour the countertop and put the butter on top of the flour.  Generously sprinkle the top of the butter with flour.  Using a rolling pin, pound the butter until it becomes a flat rectangle. Folding it over several times until the butter becomes pliable.  It should still be cold. This will make it easier to incorporate the butter into the dough.

After the dough has been kneading for 8-10 minutes, it’s time to test the dough’s gluten development. Pull up a thin piece of dough and stretch it as far as you can before it tears.  It should stretch thin enough to see through.  This is the window-pane test.   If it tears too quickly, knead it for a couple more minutes and repeat the test.

Once the dough passes the window pane test, it’s time to add the butter. While the mixer is on, add the butter to the dough a little at time and beat it until it’s fully incorporated.

Cover the dough and let it rise for one hour.  It should be soft and should have risen by a third.  Dust the countertop with flour and turn the dough onto it.  Fold it over several times.  Use a bench knife to scrape up any dough bits that stick to the surface.  Place in a greased bowl, cover and refrigerate for 4 to 16 hours.

Remove from the refrigerator, divide the loaf into two pieces, and form it into two loafs.  You can roll it out flat and then roll it into a loaf shape. This will give you nice long strands for the dough structure. You can also divide each loaf into 3 more pieces, roll them into a long snake-like ribbon, and braid the pieces into a loaf.

Cover the dough lightly and allow it double in size, about 2 ½ to 3 hours.  Preheat oven to 375 degrees.  Beat the egg yolk with 1 tablespoon of water and brush the exposed surfaces.  Bake the brioche for 45-50 minutes or until it’s internal temperature reaches 190 degrees and is golden brown.  After 10 minutes, remove the bread from the pan and allow it cool completely.

Brioche

From the Kitchen of Lynnae Hymas

Recipe by King Arthur Flour

Serves: 2 loavesPrep Time: 30-60 minutes active, 24 hours passiveCook Time: 45-50 minutes

INGREDIENTS:

  • 5 cups or 21 ounces of all-purpose flour
  • 1 tablespoons yeast
  • ½ cup or 4 ounces of cool water
  • 8 large eggs, plus 1 egg yolk for glaze
  • 4 tablespoons sugar
  • 1 ½ teaspoon salt
  • 2 cups cold unsalted water

INSTRUCTIONS:

Put 3 cups of flour, yeast, water, and eggs in a mixing bowl.   Beat on medium speed with the paddle attachment until the batter is smooth.  This is a sponge that will give the yeast a head start.  Cover it and let it sit for 45 minutes.  The mixture will develop a few bubbles.

Add the remaining 2 cups of flour, the sugar, and salt.  Beat until the dough cleans the side of the bowl and becomes shiny and elastic.  It will take 8 to 10 minutes. 

In the meantime, flour the countertop and put the butter down.  Sprinkle the top of the butter with flour.  Using a rolling pin, pound the butter until it becomes a flat rectangle, folding it over several times until the butter becomes pliable.  It should still be cold. 

Test the dough’s gluten development by pulling up a thin layer and stretch it as far as you can before it tears.  It should stretch thin enough to see through.  This is the window-pane test.   Add the butter to the dough a little at time and beat it until it’s fully incorporated.

Cover the dough and let it rise for one hour.  It should be soft and should have risen by a third.  Dust the countertop with flour and turn the dough onto it.  Fold it over several times.  Use a bench knife to scrape up any dough bits that stick to the surface.  Place in a greased bowl, cover and refrigerate for 4 to 16 hours.

Remove from the refrigerator, divide the loaf into two pieces, and form it into two loafs.  Cover the dough lightly and allow it double in size, about 2 ½ to 3 hours.  Preheat oven to 375 degrees.  Beat the egg yolk with 1 tablespoon of water and brush the exposed surfaces.  Bake the brioche for 45-50 minutes or until it’s internal temperature reaches 190 degrees and is golden brown.  After 10 minutes, remove the bread from the pan and allow it cool completely.

Italian

Cannoli Cream, Part 2

Making cannoli cream is definitely the easier part of making cannoli. You can go all in and make the cannoli shells from scratch or you can buy some pre-made cannoli shells. You can also serve a deconstructed cannoli by making “chips” using our cannoli shell dough recipe, or you can break apart some waffle cones and use those.

Just a note about the ricotta cheese in this recipe. It’s pretty easy to make from scratch (click here for the recipe), which has a much creamier texture, or I would use the Galbani whole milk brand from the store. I’ve found any other brand to have a grainy texture in the filling.

To make the cream, combine the ricotta cheese, mascarpone, powdered sugar, cinnamon, and vanilla extract.  Whip the cream (you can sweeten this if you prefer a sweeter dessert). Add the chocolate chips and whipped cream to the cheese mixture and fold it in.

Using a pastry bag, pipe the filling into the cannoli shells and dip the ends in mini chocolate chips or chopped pistachios.

The cannoli shells will soften up as the cream sits in them. To avoid a soggy shell, fill them within 1-2 hours of serving.

Cannoli Cream

From the Kitchen of Lynnae Hymas

Serves: 25-30Prep Time: 15-30 minutesCook Time: NA

INGREDIENTS:

  • 15 ounces whole milk ricotta (Galbani Brand is the smoothest or try homemade)
  • 8 ounces mascarpone, softened
  • 1 ½ cups powdered sugar
  • 1 ½ teaspoon cinnamon
  • 1 ½ teaspoon vanilla extract
  • 1 cup whipped cream
  • ½ cup mini chocolate chips, plus extra for garnish
  • Crushed pistachios for garnish

INSTRUCTIONS:

Combine the ricotta cheese, mascarpone, powdered sugar, cinnamon, and vanilla extract.  Whip the cream until soft peaks form.  Fold the cream and the chocolate chips into the filling.  Pipe into the cannoli shells and dip the ends into mini chocolate chips or crushed pistachios.  Serve within 1-2 hours of filing

Dessert, Italian, Uncategorized

Cannoli, Part 1

I’m a little embarrassed to admit that I didn’t know what a cannoli was until about 4 years ago when my husband went on a business trip to Boston. While there, he had a little time to explore the popular tourist sites in Boston and stopped by Mike’s Pastry, a couple of times. He brought me home a cannoli, which admittedly is never as good when it’s a day old, but I was still hooked on the tasty dessert.

Mikes Pastry, Boston

After that, we discovered several bakeries in Detroit that serve really delicious cannoli and we were hooked. Whenever traveling, I always look to see if there is a good cannoli shop nearby.

Il Pirata Delle Cinque Terre
Mike’s Pastry, bBoston
Ferrara Bakery & Cafe, Little Italy, NYC

Feeling the craving yet? Unfortunately, Twin Falls, Idaho is not home to a cannoli shop. There are a couple of local restaurants that serve them, but, they are not quite the same. So….in true Hymas Family Favorites tradition, we learned how to make our own.

Start by making the dough.

Add the flour, sugar, cinnamon, and salt to a stand mixer with the paddle attachment. Mix on slow. Add the vinegar and mix until combined. Next, add the shortening. Finally, add the egg to the water, whisk, and add to the dough. Mix until combined, and then knead it for about 1 minute. The dough should be soft. Form it into a disk, wrap in saran wrap, and refrigerate for 30 minutes.

Next, take a generous piece of the dough and roll it out with a rolling pin.

The goal is to get to 1/16 of an inch. The easiest way to do that is with a pasta roller. I start on the widest setting (1) and step it down to a 3.

Now cut the dough with a round 3-4 inch biscuit cutter.

Pre-oil the cannoli forms and wrap the dough around the form. Dampen one edge of the dough with a wet finger and seal the dough around the form. Don’t wrap it too tightly or t will be difficult to remove after it’s finished frying. If you don’t have the forms, you can cut the dough into “chips” and serve it with cannoli cream as a deconstructed cannoli.

Put the dough on the forms into a deep fryer with the oil heated to 375 degrees. You can do this in a heavy pan on the stove top and use a thermometer, or you can use a deep fryer. I LOVE my deep fryer because it really helps to contain the mess, makes it easy to filter and contain the oil, and maintains the oil temperature for me.

The shells will need to cook for 2-4 minutes until golden brown. I start turning the shells almost immediately to minimize any hot spots. You can also turn them half way through the cooking process. When they are finished cooking, pull them out and allow them to drain for a minute. Again, the basket on the deep fryer makes this a much easier step. After they are done draining, turn them onto some paper towels to help soak up the grease.

You’ll need to get them off the forms fairly quickly. They slide off much easier when they are hot, and depending on how many forms you have, you’ll need them for the next batch. I have a total of 12 which seems to be a good number to keep the process moving while allowing time for the forms to cool off enough between batches.

They key to this is using a thin flour sack type towel. I use one end to hold the form and the other end to grab the shell and pull it off. Be careful not to burn yourself. I recommend watching the video to see the technique for this. It’s not hard, but easier to visualize than to read about how to do it.

Let the shells cool completely before filling. Here is a recipe link for the filling.

Cannoli Shells

From the Kitchen of Lynnae Hymas

Serves: 30Prep Time:  2-3 hoursCook Time: 2-4 minutes per batch (12-24 minutes total)

INGREDIENTS:

  • 3 ½ – 4 cups all-purpose flour (450+ grams)
  • 2 tablespoons sugar
  • 1 teaspoon cinnamon
  • 1 teaspoon salt
  • ¼ cup shortening
  • 1 egg yolk
  • 1 cup water
  • ¼ cup white vinegar

INSTRUCTIONS:

Add flour, cinnamon, sugar, and salt to stand mixer with paddle attachment on slow.  Add the vinegar and mix. Add the shortening.  Mix the egg yolk and water together then add to the dough, which should be soft.

Knead the dough for about 1 minute and let rest in the fridge for 30 minutes.  Roll into a sheet 1/16” (pasta roller stepped down from 1 to 3).  Cut into a 3-4” circle and then wrap around a pre-oiled cannoli form.  Dampen one edge with water using your finger to seal the dough.

Heat the oil to 375°F and starting with the sealed side down cook each cannoli shell for 2-4 minutes until golden brown, turning occasionally throughout the cooking time. 

Using a thin towel, remove the cannoli from the forms immediately and allow to cool completely.  Cannoli shells may be stored in the refrigerator in an air-tight container for 1-2 months.  Makes 30 shells.

Breakfast, Healthy

Aunt Sue’s Granola

This spring, my husband and I participated in a fitness challenge. I will post all about it in a later post, but it was both effective and hard. One of the rules was no refined sugar, so we were always looking for healthier foods that fit that criteria.

One weekend, we went camping with Aunt Sue and Uncle Andy. Aunt Sue is so good at eating healthy, and let us try her granola. It is sweetened with honey and is chuck full of healthy grains. It also happens to taste really good. So, I thought I’d share the recipe with all of you!

Aunt Sue’s Granola

From the Hymas Family Favorites

Serves: 8Prep Time:  30 minCook Time: 15 min

INGREDIENTS:

  • 5 cups quick oats
  • 1 cup Rice Krispies
  • ½ cup ground flax seed
  • ½ cup chopped and roasted almonds
  • ½ cup unsweetened coconut
  • ½ cup craisens
  • ¼ cup ground chia seeds
  • ¼ cup sesame seeds
  • ¼ cup sunflower seeds
  • ¼ cup pumpkin seeds
  • 1 teaspoon salt
  • 1 teaspoon vanilla
  • 1 teaspoon cinnamon
  • ½ cup melted coconut oil
  • 1 cup honey

INSTRUCTIONS:

Preheat oven to 350 degrees. Combine the oats, Rice Krispies, flax seed, almonds, coconut, craisens, chia seeds, sesame seeds, sunflower seeds, pumpkin seeds, salt, vanilla, and cinnamon.  Mix together until the ingredients are evenly distributed.  Drizzle the coconut oil over top and stir.  Heat the honey in the microwave for 30-60 seconds and drizzle over the granola.  Thoroughly combine.  Line 2 cookie sheets with parchment paper.  Divide the granola onto both and bake them at 350 degrees for 15 minutes.  Stir occasionally for even cooking.  Remove from oven and allow to cool completely.  It will harden into a sheet as it cools.  You can continue to stir occasionally while it cools if you prefer a very flakey texture, or you can break it into chunks after it cools if you prefer it that way.

Tips: You can usually find these ingredients in bulk from your local grocery store that carries bulk items. Grinding the flax and chia seeds in the blender will help keep them from getting caught in your teeth. You can also roast your almonds in a single layer on a cookie sheet at 350 degrees for 15 minutes, then chop them up. You can also store the ingredients in air tight containers or in the freezer.

Freezer Meal, Italian

Lasagna

Lasagna is one of those dishes that is so easy to make a double or triple batch for very little extra time. You can feed a crowd or throw an extra in the freezer for a day when all you have time to do is throw it in the oven. It’s also so great to have on hand to take dinner to a sick or mourning friend. I love to keep these on hand because they are great comfort food.

For this recipe, you’ll need a batch of my tomato sauce. You can also use our homemade ricotta cheese or our homemade pasta in this recipe.

Start with a batch of tomato sauce. This does take some time to simmer on the stove top, so you make want to make the sauce the day before or the morning of.

After your sauce is ready, brown your hamburger and sausage together in a frying pan. Drain the grease and add the meat to the tomato sauce.

Next you’ll combine the cottage cheese, ricotta cheese, and egg together in a bowl. You can also add an optional 1/2 cup of freshly grated Parmesan cheese to the mix. It’ll add to the depth of flavor in your lasagna. You’ll also need a pound of grated mozzarella cheese. My preference is to buy the already grated cheese from the store for ease.

After the sauce and cheese are ready to go, the next step is assembly. Preheat your oven to 350 degrees. Start with a thin layer of sauce on the bottom of a 9×13 pan. (My preference is to use the aluminum ones because they are easy to clean up and easy to freeze. My local restaurant supply store carries them for less than $0.50 a pan, so you may want to try a store like that to get a great price on the pans.) Next, layer the noodles. My favorite are the Barilla oven ready lasagna noodles. 3 fit perfectly in the pan, AND I don’t have to boil them first. Next, layer the cottage cheese mixture, sprinkle mozzarella over that, then a thick layer of sauce. Repeat the layers of cottage cheese, mozzarella cheese, and sauce. Top it off with 1/2 cup of freshly grated Parmesan cheese.

Bake for 45-60 minutes. If you are baking a frozen lasagna, plan an additional 1-1 1/2 hours baking time.

Allow the lasagna to stand for 10 minutes before cutting into it. This allows it to set up a bit and keep the layers from running all over the plate.

Lasagna

From the Kitchen of Lynnae Hymas

Serves: 8-12Prep Time: 30 minCook Time: 45-60 min

INGREDIENTS:

  • 1 recipe of tomato sauce
  • 1 pound hamburger
  • ½ pound pork sausage
  • 2 cups cottage cheese
  • 1 cup ricotta cheese
  • 2 eggs, beaten
  • 6 oven ready lasagna noodles
  • 1 pound grated mozzarella cheese
  • ½ cup freshly grated Parmesan cheese (optional: extra ½ cup of Parmesan cheese)

INSTRUCTIONS:

In a large skillet over medium-high heat, sauté the hamburger and sausage until brown. Drain off the excess fat. Add to the tomato sauce. 

Grate the mozzarella cheese and set aside.  In a medium bowl, combine the cottage cheese, ricotta cheese, optional ½ cup of Parmesan cheese, and the eggs, and stir together well.

Preheat the oven to 350 degrees F.  

To assemble the lasagna: put a small amount of sauce in the bottom of a 9×13 baking pan to prevent sticking.  Layer 3 lasagna noodles on top of the sauce. Spoon half the cottage cheese mixture onto the noodles; spread to distribute evenly. Sprinkle half the mozzarella on top of the cottage cheese mixture. Spoon just under half the meat mixture on top of the mozzarella, and spread evenly, being careful not to disrupt the layers below. Now repeat the process, beginning with a layer of lasagna noodles, followed by the cottage cheese mixture, followed by the mozzarella, and ending with a thick layer of the meat mixture. Sprinkle the Parmesan over the top.

Bake until the lasagna is hot and bubbly, 45 to 60 minutes. Allow to stand 10 minutes before cutting into squares.

Helpful Hint: Lasagna can be fully assembled and frozen, unbaked!  I double the sauce and cheese and get 3 9×13 pans of lasagna.  You can also make this a day or two ahead and keep refrigerated until you are ready to bake.

Easy Dinner Ideas, Italian

Browned Butter with Mizithra Cheese Spaghetti

If you’ve ever eaten at the Old Spaghetti Factory, you may have tried their browned butter with mizithra cheese spaghetti. I LOVE it, but I live no where near an Old Spaghetti Factory, SOOOO, I have to make it at home whenever I get the craving. It’s actually super easy to make and kids love it. Win, win, win!

You need 3 ingredients for this dish–spaghetti (prepare spaghetti according to package directions, or make your own pasta to kick things up a notch), butter, and mizithra cheese. I find mizithra cheese at our local Winco grocery store here in Twin Falls, ID, so I’m pretty sure it’s not too hard to find.

1 cube of butter serves about 4 people. Using a medium sauce pan, melt your butter over medium to medium high heat, stirring constantly so your butter doesn’t burn. It will only take a few minutes from the time the butter melts to the time it turns into a caramel brown color. It will also give off a caramel smell. As soon as you reach this point, remove the butter from the heat. I like to strain it to remove the solids that will form.

From here, it’s easy peasy. Put the pasta on a plate and top with butter and grated mizithra cheese. ENJOY!