If you have ever been to Italy, you know how much Italians love gelato, which is the Italian version of ice cream. There are gelato shops on every corner. When I was there, I think we had three to four scoops a day.
While there are a few gelato shops scattered here and there, it’s definitely not as easy to find where I live. So…. here is our gelato recipe.
Gelato
From the Kitchen of Lynnae Hymas
Serves: 4-6
Prep Time: 1 hour active 48 hours in refrigerator/freezer
Cook Time: 10-15 minutes
INGREDIENTS:
2 cups whole milk
5 egg yolks
1 cup cream
¾ cup granulated sugar
¼ cup dextrose sugar
¼ cup powdered milk
1 tablespoon Amoretti flavoring of your choice
INSTRUCTIONS:
Heat the milk over medium heat to 175 degrees F. While the milk is heating combine the egg yolks, cream, sugars, and powder milk. Whisk together until thick and lemony yellow. After the milk is heated, temper the egg mixture by gradually adding the milk and stirring constantly. When combined, pour the gelato base back into the pan and heat it to 170 degrees F. Once it reaches 170 degrees F, remove from heat and add the flavoring. Strain the mixture through a fine mesh strainer, cover, and refrigerate overnight. The next day, add to an ice cream freezer and churn on low speed until thickened, about 15-20 minutes. Put in a container and then freeze overnight.
Years ago, when our kids were small, we lived in Salt Lake City. Every year around the Fourth of July, we loved to go to Taylorsville Dayzz. They would have the Utah Symphony perform during a fireworks show, along with tons of food vendors. We loved it.
One year, there was a booth selling grilled corn on the cob. It was THE BEST corn on the cob I’ve ever had. Sadly, the next year we went back and the vendor wasn’t there (and I never got a picture of it). Ever since, every summer when the corn comes on, I find myself wishing for that amazing yumminess, and never being able to find it.
So…I’m on a mission to try to create the perfectly grilled corn on the cob recipe. I think no matter what recipe you use, it’s important to start with a really fresh and young corn.
This can be a daunting task. Growing up, my mom would separate husk at the crown of corn near the tassels to see what the corn looked like. You may want to do that with one ear to make sure that the kernels are fairly small and light in color. The later the corn was picked the larger the kernel and the more yellow the kernels will be. Once you decide the crop is young, if the ear has a good tassel and feels full, it’s probably a good ear.
I started my search for the perfect corn on the cob with straight up grilled corn. With this, I tried a new technic to husk the corn. I chopped of the bottom of the corn, microwaved it on high for 3 minutes, and then just peeled the husk off. The biggest benefit to this method was the husk and silk really did come off easier and were less messy. However, if you include the cook time, this is definitely a slower way to husk the corn.
From here, I cut the cob in half based on the crowd I was expecting. I brushed them with butter, and threw them on the grill for 3-5 minutes per side.
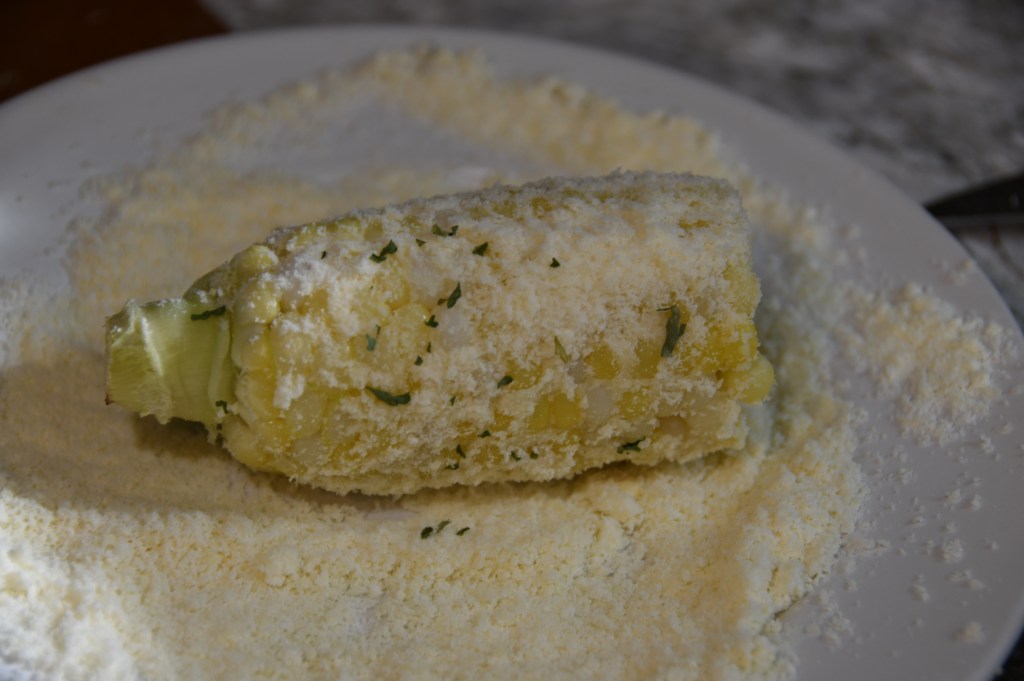
Finally, I put more butter on the corn and rolled it in Parmesan cheese. This was good, but I think we can do better.
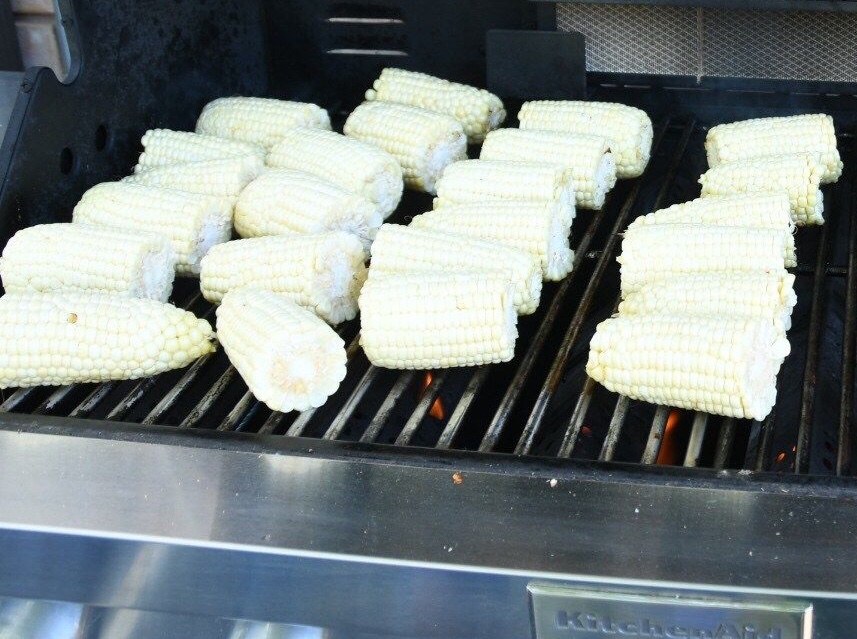
My next attempt involved soaking the corn in the sink for about 2 hours, trimming the tassels and ends, and grilling them husk on.
After husking the corn, I rolled it in butter and either Cotija or Parmesan cheese. The corn itself turned out great, and the family preferred the Parmesan cheese to the Cotija, but it still wasn’t quite it, but much much closer to the corn I remembered.
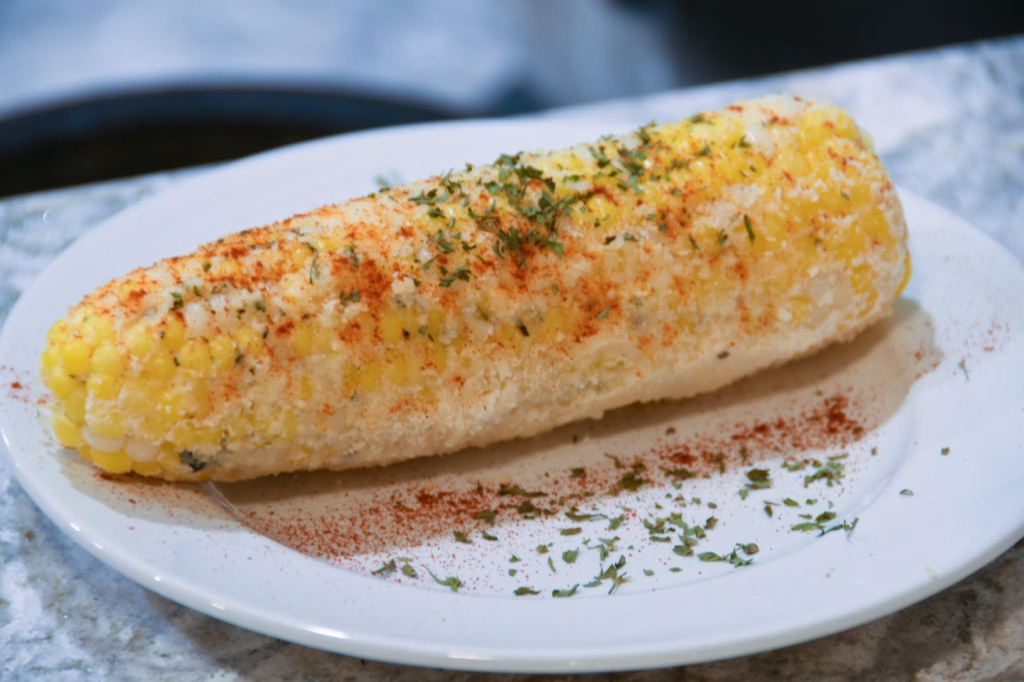
For the third attempt, I again soaked the corn and grilled it husk on. I removed the husk as it came off while grilling, which allowed for a little char, but still steamed the corn. When it came off the grill, I smothered it in herb infused butter, then rolled it in Parmesan cheese. My friends, we have a winner! So the next time you have a summer barbecue, try this delicious recipe for corn on the cob.
Grilled Corn on the Cob
From the Kitchen of Lynnae Hymas
Serves: 6
Prep Time: 15 min
Cook Time: 10 min
INGREDIENTS:
6 ears of fresh corn on the cob
1 cup grated Parmesan cheese
Paprika for sprinkling
Parsley for sprinkling
Herbed Butter
2 cubes of softened butter
1 teaspoon garlic salt
1 teaspoon dried basil
1 tablespoon parsley
INSTRUCTIONS:
Soak the corn in the sink for at least 2 hours.
While the corn is soaking, you can make the herb butter. In a bowl, cream together the butter, garlic salt, dried basil, and parsley. Set aside.
After the corn has soaked, trim the ends of the corn and pull off the outer leaves. Put the corn on the grill for about 10 minutes until the outer leaves are charred, turning midway through. Remove the corn from the grill. Peel off the remaining leaves and corn silk. Slather in the herbed butter and roll in Parmesan cheese. To finish, sprinkle with paprika and parsley.
The first time I had ribs and actually liked them was at a friend’s house who had us over for dinner. Until then, I thought ribs were crazy hard to make. Turns out, they are pretty simple and fool proof.
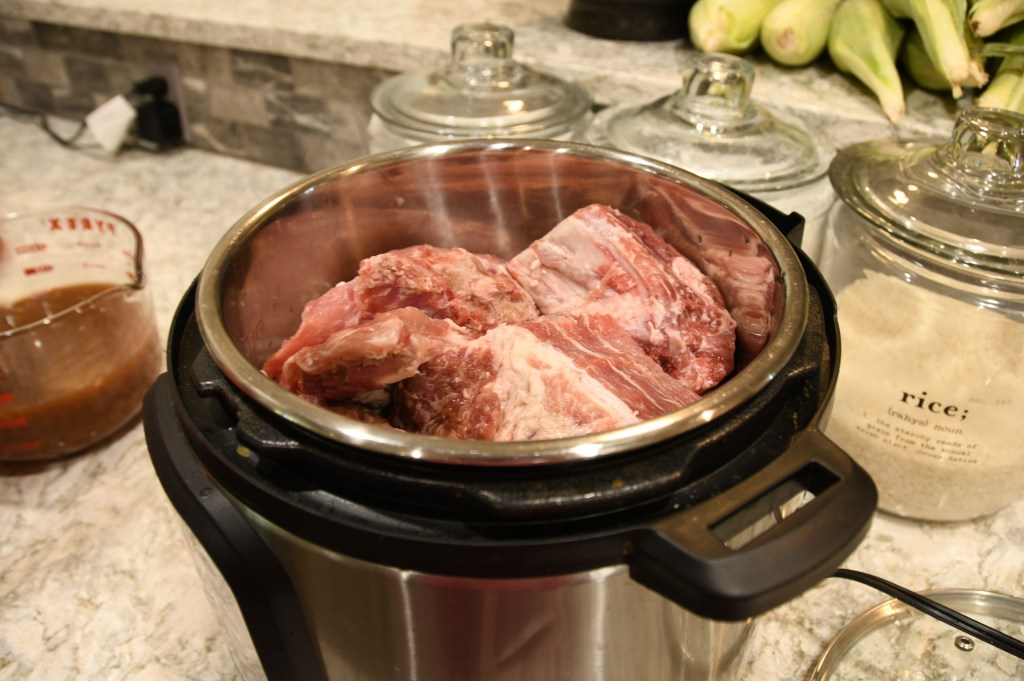
The secret to this recipe is the slow cooker. I like to use my Instant Pot on the slow cooker setting. If you do this, they will be perfectly marinated and fall off the bone tender.
Mix together all of the ingredients from the recipe in the pot except the ribs and the barbecue sauce. Cut the ribs into serving size pieces. Add the ribs to the Instant Pot. ( You can also just mix the marinade in a bowl and then pour it over the top of the ribs.)
Cook on high for 4 hours or on low for 6-8 hours. After that, you just need to pull the ribs out of the marinade, slather them with your favorite barbecue sauce, and grill them for 2-4 minutes per side. Easy peasy. You got this!
Babyback Ribs
From the Kitchen of Lynnae Hymas
Recipe by Our Best Bites
Serves: 3 adults
Prep Time: 10-15 min
Cook Time: 4-8 hours
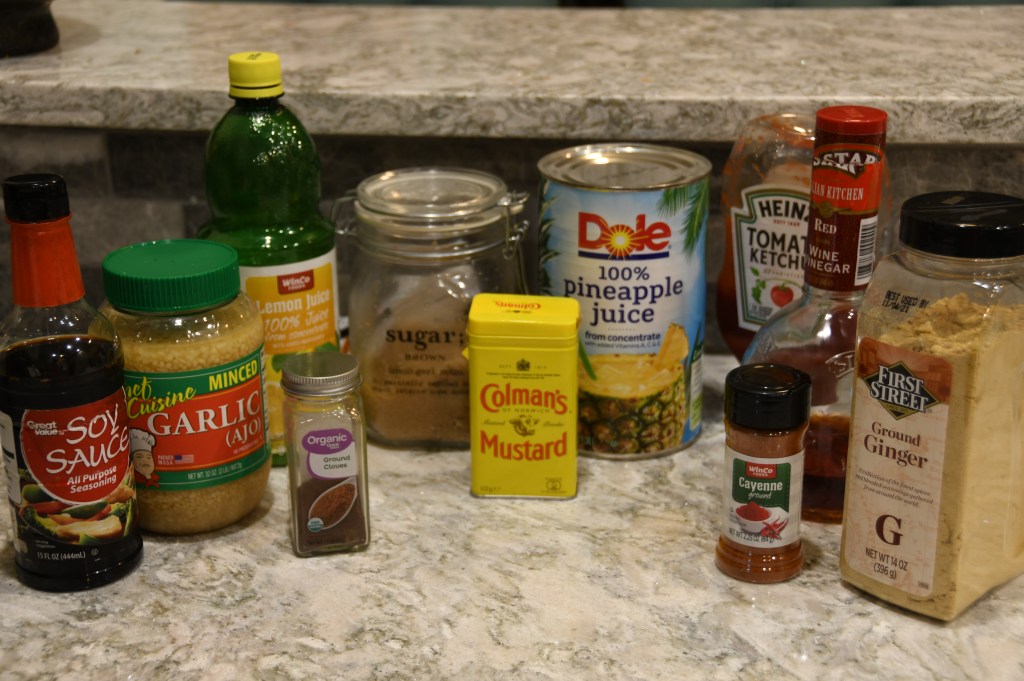
INGREDIENTS:
1 rack babyback ribs (1 rack will feed 2-3 adults; another rack of ribs will work with the marinade if your crockpot can fit them)
3 cups pineapple juice
1 ½ cups brown sugar
1 ½ teaspoons mustard powder
1/3 cup ketchup
1/3 cup red wine vinegar
1 ½ Tablespoons lemon juice
2 Tablespoons soy sauce
½ teaspoon ground cloves
2 teaspoons ground ginger
4 cloves garlic, minced
½ teaspoon cayenne pepper
Your favorite barbecue sauce
INSTRUCTIONS:
Using a sharp knife or a pair of kitchen shears, cut each rack into about 4-6 portions (it ends up being about 2-4 rib bones each).
Mix pineapple juice, brown sugar, mustard powder, ketchup, red wine vinegar, lemon juice, soy sauce, cloves, ginger, garlic, and cayenne pepper. I like to do this in the cooking pot and then add the ribs. Cover. Cook on high for 4 hours or low for 6-8 hours.
Remove the ribs from marinade and heat grill to medium. Brush both sides of the ribs barbecue sauce, put the ribs on the grill, and close the lid for 2-4 minutes. Carefully turn the ribs, close the lid, and wait another 2-4 minutes. Remove from the grill and serve immediately.
Smoked brisket is a classic barbecue food. A friend of mine from Texas told me that in Texas it is a cheap, throw away meat, but to me it is classic Texas barbecue.
Smoking your brisket takes a bit of time. In fact, you’ll probably want to start it the day before you plan to serve it, unless you want to get up at 5 am. The attached video shows how to smoke it overnight. Alternatively, you can smoke it on the same day using the following times and temperatures.
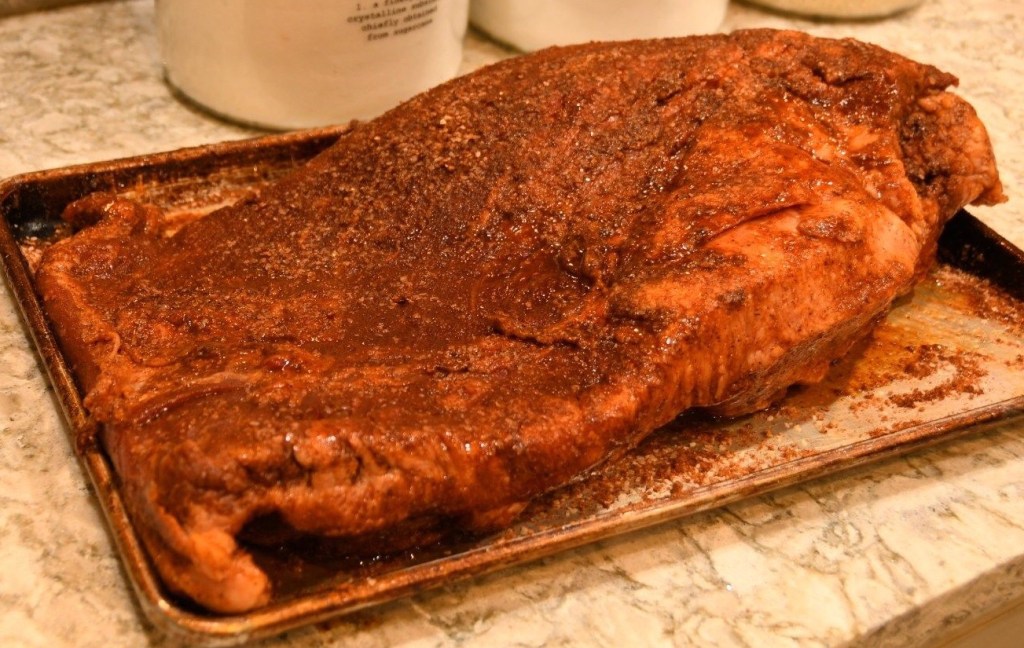
First things first, you need to trim the fat. You’ll want to leave about a 1/4″ thickness. This will allow the rub to penetrate to the meat, but still leave the flavor and moisture that come from the layer of fat.
Next, rub the meat all over with olive oil and then a generous amount of rub.
Cover with Saran wrap and refrigerate for several hours to overnight. In a pinch, you can smoke it right away, but allowing the seasoning time to penetrate is worth the wait and extra time.
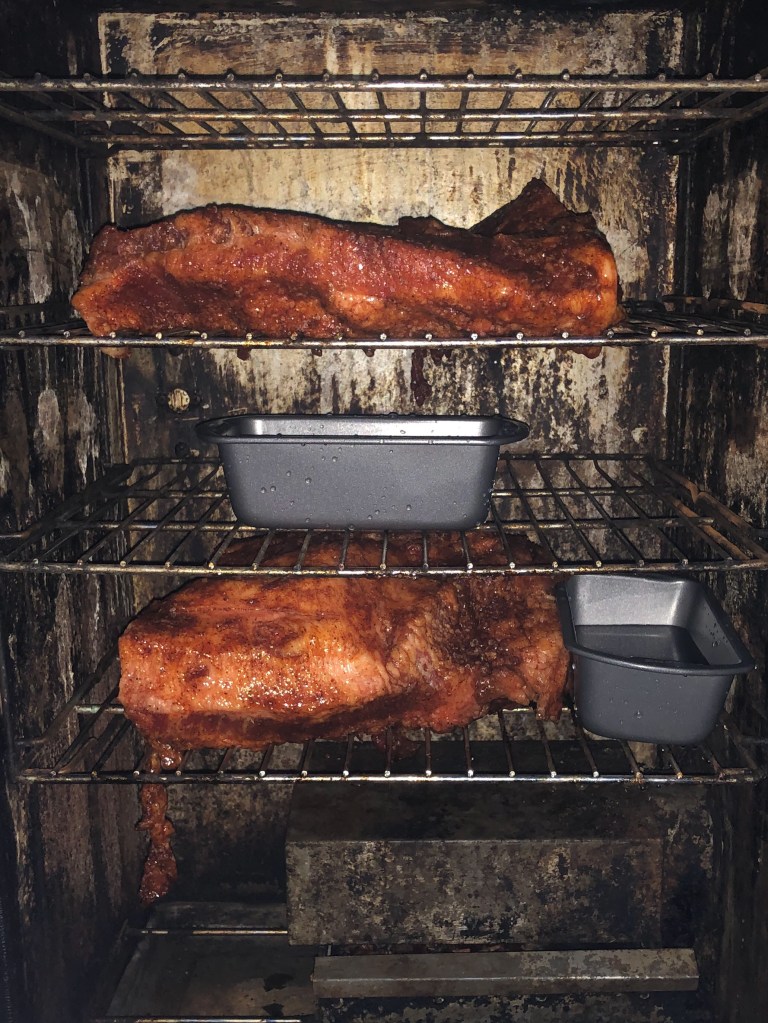
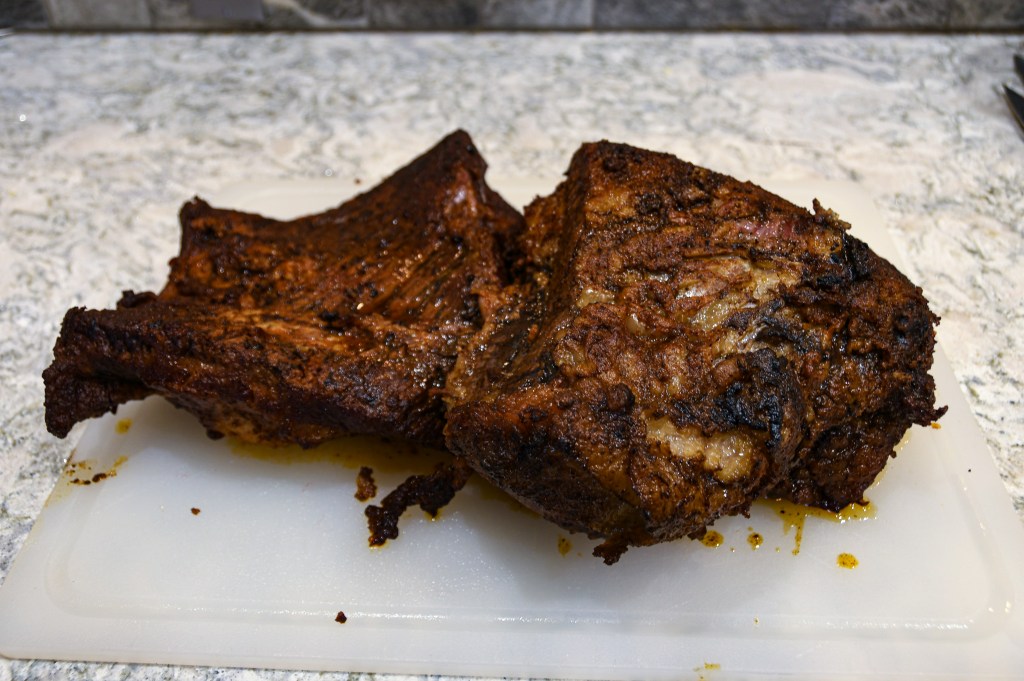
Next, uncover the meat and put it in a 225 degree smoker, along with a pan of water. Because of the limitations of size in our smoker, we cut it in half. The water will help humidify the smoker and diffuse the heat. When the meat reaches 160 degrees (this will take several hours), you will double wrap it with aluminum foil, and then return it to the smoker.
When the meat reaches an internal temperature of 203 degrees (after several more hours), it is done cooking. You will want to wrap the meat inside the in aluminum foil in a towel and then keep it in an ice chest for an additional 1-2 hours. This will allow it to rest and ensure a juicy brisket.
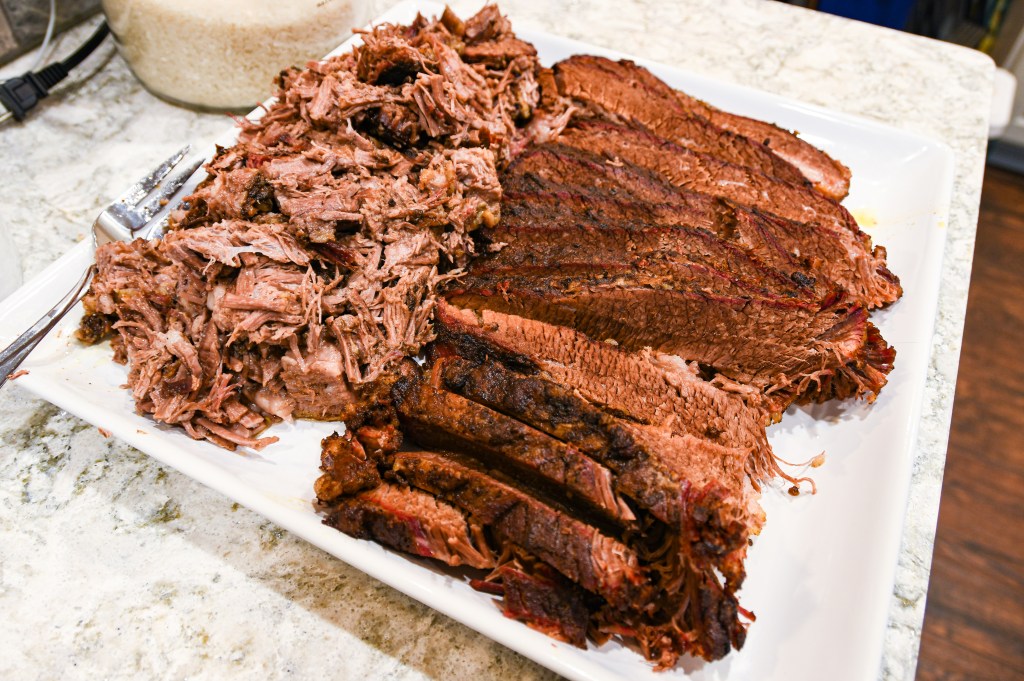
Finally, you will want to slice the flat against the grain (the thinner part), and shred the cap (the thicker, fattier end) for serving. You can also dice it up and make burnt ends with it, but we’ll cover that in a future post. Last, but not least, ENJOY!!!!
The day before you plan to serve your brisket, trim the excess fat off the brisket (leave ¼ inch thick fat on the brisket), apply olive oil and liberally apply rub to the brisket (as much as will stick). Wrap in plastic wrap. Refrigerate for several hours up to overnight. In a pinch you can cook right away, but ideally seasoning would have time to penetrate.
Preheat your smoker to 225 degrees. We use wood like hickory or mesquite (make sure to soak it in water ahead of time). Place brisket in the smoker along with a pan of water to humidify the smoker.
When the internal temperature of the brisket is around 160 degrees, double wrap the brisket in aluminum foil. Replace the temperature probe and return to smoker. Continue to smoke until the internal temperature reaches 203 degrees (this will take several hours). Remove from the smoker, wrap in a towel, and place in an insulated cooler to rest for 1-2 hours.
Remove from the ice chest and separate the flat from the cap. Slice the flat against the grain. The cap can be shredded and served. Alternatively, the cap can be diced, covered in barbeque sauce, and baked at 250 degrees in the oven until the sauce is caramelized, resulting in delicious burnt ends.
Alternatively, smoke at 170 degrees overnight. Approximately 5-6 hours before serving, double wrap the brisket in aluminum foil and increase the temperature to 225 degrees. When the internal temperature reaches 203 degrees, place in the cooler and follow the remaining steps as above.
One of my favorite BBQ meats is actually smoked brisket. This post is a teaser for some upcoming end of summer BBQ dishes, featuring a recipe and video from a special guest on how to smoke a brisket. And every good brisket starts with a good rub. One of THE best rubs I’ve ever had is from a recipe by Vindulge.
This recipe is simple and the rub goes great on chicken, beef, or pork. What more could you ask for?
Just take all of the spices, add them to a bowl, and mix together. If you like a spicy rub, add a little more cayenne pepper to the rub.
Dry Rub for Pork, Chicken, and Beef Brisket
From the Kitchen of Lynnae Hymas
Recipe by Vindulge
Serves: 1 brisket
Prep Time: 5 min
Cook Time: n/a
INGREDIENTS:
1 cup brown sugar
½ cup kosher salt
4 tablespoons smoked paprika
2 tablespoons coarse black pepper
½ tablespoon cumin
½ tablespoon onion powder
½ tablespoon garlic powder
1 teaspoon cayenne pepper
INSTRUCTIONS:
Combine all ingredients together, and store in an air-tight container. This rub does come out pretty mild. If you like a little more heat, add more cayenne pepper to your liking.
These last few blog entries have been all about English Afternoon tea. As a final topping for our biscuits and clotted cream, I made some strawberry freezer jam. These directions and recipe are almost identical to the raspberry peach freezer jam I made a couple of weeks ago.
First, you’ll need to prepare your containers. I usually just wash mine in the dishwasher. Next, prepare your fruit. For this jam, you should mash your strawberries with a potato masher and squeeze the lemons.
After preparing the fruit, add the exact amount of strawberries and sugar to a bowl. Combine thoroughly. The key to a good jam is getting the sugar to completely dissolve in the fruit. The fastest and easiest way to accomplish this is to microwave it. I start at 3 minutes, test it by tasting it, and then add another minute at a time until the sugar is dissolved.
Now mix the lemon juice and the CERTO in a separate bowl and then add it to the fruit. Combine and continue to stir for 3 more minutes. The jam should begin to set up fairly quickly. Scoop it into your glass or plastic containers using a funnel and leave 1/2 inch of head space for freezing.
It should mature on the counter top for 24 hours, then go in the refrigerator or freezer. You can store it for up to 3 weeks in the refrigerator, or up to a year in the freezer. Now you can enjoy the fresh taste of summer all winter long.
Measure the exact amounts of crushed strawberries into a large bowl.
Measure the exact amount of sugar into the fruit and combine.
Let stand 10 minutes. Stir occasionally.
If, after 10 minutes, the sugar is still not dissolved, put the fruit mixture in the microwave on high power for 3-5 minutes until the sugar is dissolved.
Combine the CERTO with the fresh lemon juice in a separate bowl.
Combine the CERTO pectin with the fruit and stir for 3 minutes.
Pour into the prepared containers, leaving ½ inch of head space.
Let the containers stand at room temperature for 24 hours.
You can store the jam in the refrigerator for 3 week or freeze for up to a year.
Last summer, 2019, my oldest son, Aiden, and I got to go on a school trip to England and Scotland (did I mention it was really an EPIC summer?). You remember when we were able to travel and go places. Sigh. We missed a full day of our tour due to a traffic jam, aka stuck on a bus with 20 teenagers for 8 hours. Good times. Anyway to make it up to us, the tour company scheduled high tea for us at Kensington Palace.
This was the real deal with tea, clotted cream and scones, finger sandwiches, and desserts. Hands down the best thing we ate while we were there.
I’ve never been much of a tea drinker, but I changed my mind that day. I only drink herbal teas, so the maitre d suggested their mint tea. Oh my goodness! 2 lumps of sugar because I have, ya know, a sweet tooth, and some cream and I thought I’d died and gone to heaven…even though it was like 90 degrees outside, and I’m pretty sure the Brits don’t really believe in air conditioning.
The other amazing part of the meal was the clotted cream. As an American, I’ve only had this once or twice before in my life, and the name doesn’t exactly inspire images of the most appealing sorts of food, but…think the creamiest softest butter you’ve ever had on steroids. It’s amazing, especially with a nice fresh and flaky scone (think buttermilk biscuit) and preserves. My mouth is watering as a write this.
Being from the States means there is really not much opportunity to eat clotted cream, and it’s definitely not something I’ve ever seen at the corner market. But, I found it is actually one of the THE easiest things in the world to make. It just takes a little time.
The ingredients are super simple—-cream. That’s it. You’ll need 1 quart of pasteurized cream. Just make sure it’s not ultra pasteurized, which I admit is a little harder to come by these days. I get mine from a local dairy.
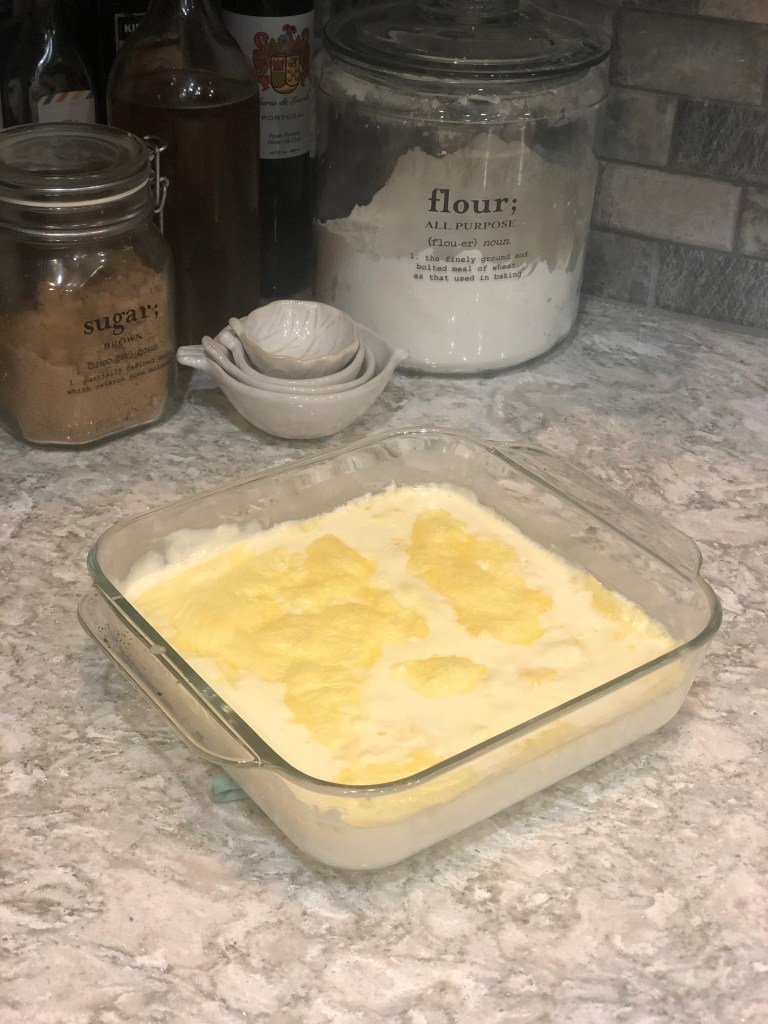
Pour the cream into a 9×9 glass pan and bake it in the oven for 12 hours at 180 degrees. Please ignore my dirty oven. 🙂
Remove from oven and allow it to cool until it gets to room temperature. Cover it with plastic wrap and put it in the refrigerator until it’s completely chilled.
When you pull it out of the fridge, it will have a crust or a thick layer on top. If you lift up one corner, you can pour off the liquid underneath. You may want to hold onto the liquid. It’s great for baking with. Biscuits maybe? Just sayin.
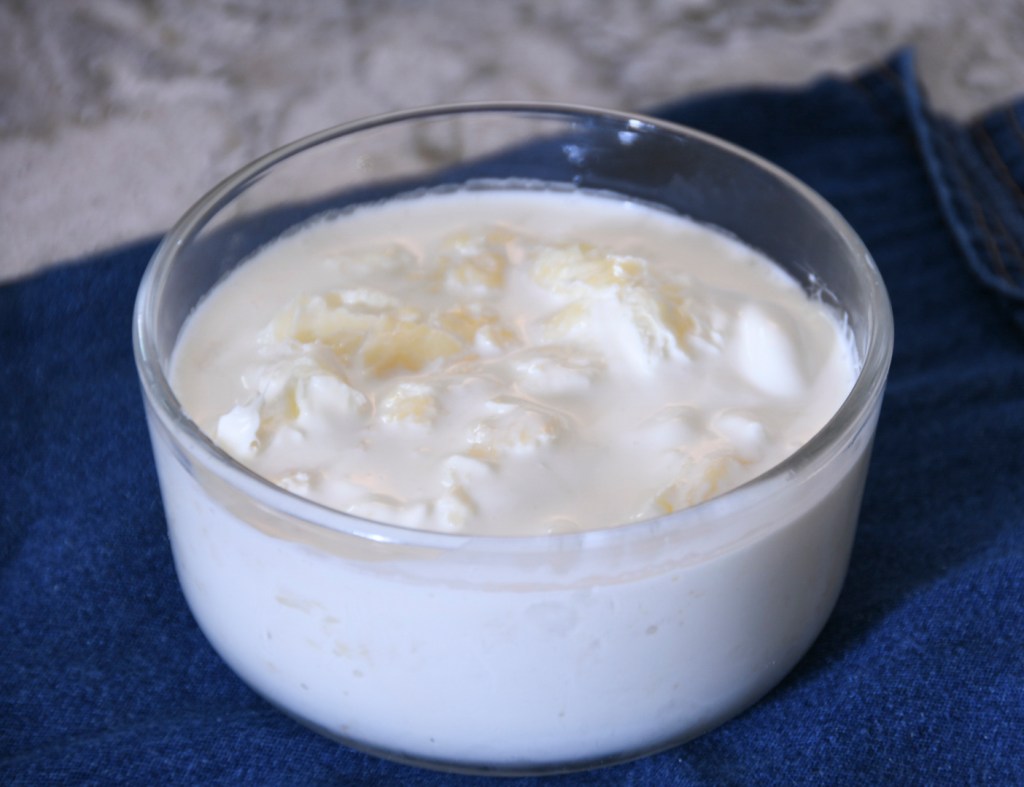
What’s left in the pan is now the clotted cream. Scoop it into a jar and cover. Some of it will be a little crusty in texture. You can just leave it as is or stir it all together and the crust part will blend in with the rest. It will keep in the refrigerator for up to 5 days. I use it like butter. So yummy!
Clotted Cream
From the Kitchen of Lynnae Hymas
Serves: 6-10
Prep Time: 10 min
Cook Time: 12 hours (plus another 12-24 hours to chill)
INGREDIENTS:
1 qt. pasteurized cream
INSTRUCTIONS:
Pour the cream into a 9×9 inch pan. Bake in a 180°F oven for 12 hours. Cool to room temperature and then cover and refrigerate until completely chilled, 12-24 hours. Lifting one corner of the now crusted cream, pour off the liquid. The liquid can be preserved and used in baking as a liquid substitute. You can then scoop up the clotted cream and store in in a smaller container in the refrigerator for up to a week.
Nothing goes better with homemade jam than buttermilk biscuits. In this video, I teach my daughter Kate how to make biscuits.
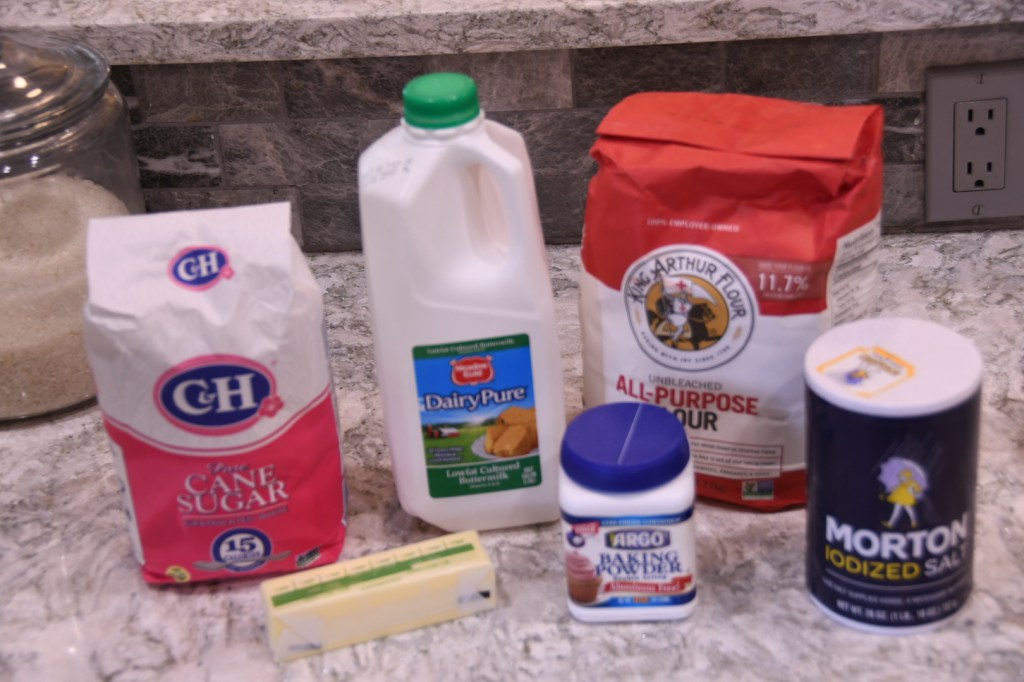
The ingredients are simple–flour, sugar, salt, baking powder, buttermilk, and butter.
Combine the dry ingredients in a bowl. Add the cold butter and cut it into the flour until it is is in small pieces. Make a well in the center of the flour mixture and add the liquid.
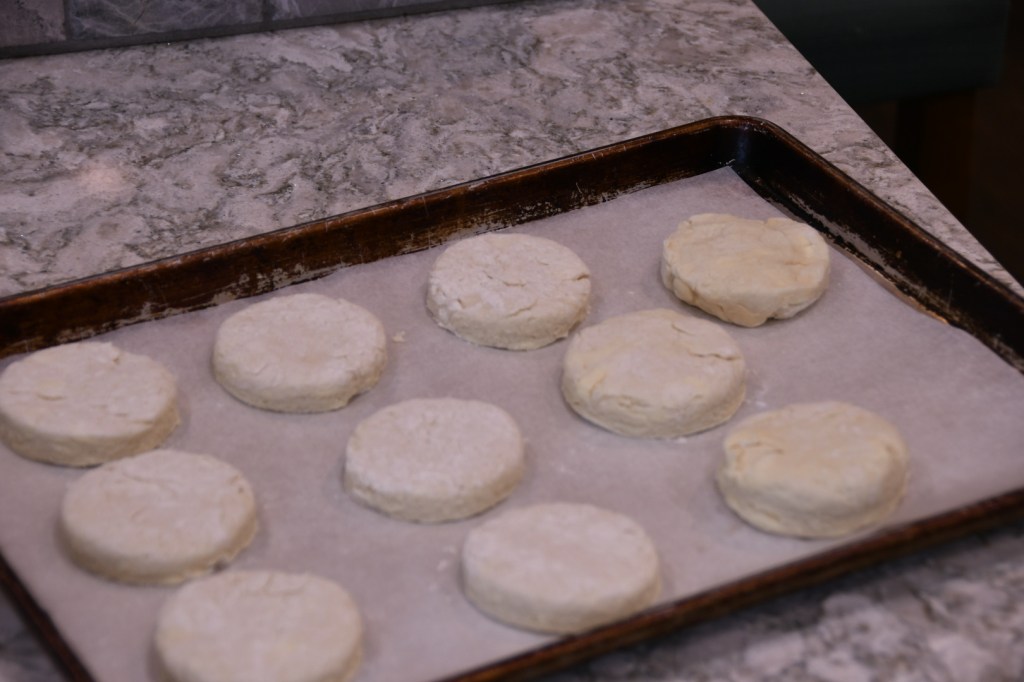
Combine just until all the ingredients are wet. Roll out into a 3/4″ thick dough, then, using a cup or a round cookie cutter, cut out your biscuits. Continue to use the scraps to re-roll out a sheet of dough until it is all used up.
Bake at 450 degrees for 12-15 minutes.
Buttermilk Biscuits
From the Kitchen of Lynnae Hymas
Serves: 4-6
Prep Time: 15 min
Cook Time: 15 min
INGREDIENTS:
2 ½ cups all-purpose flour, plus more for kneading and rolling
3 ½ teaspoons baking powder
1 tablespoon sugar
1 ½ teaspoons salt
½ cup unsalted butter
1 ¼ cups buttermilk (can substitute milk using a ratio of 1 cup milk + 1 tablespoon of vinegar or lemon juice or the whey from clotted cream)
INSTRUCTIONS:
Heat the oven to 450°F. Combine the flour, baking powder, sugar, salt, and baking soda in a large bowl. Add the butter and blend with a pastry cutter until the mixture resembles coarse crumbs. Add the buttermilk and stir just until combined, then transfer dough to a floured surface and knead 5-6 times. With a rolling pin, roll out the dough until is ¾ inch thick. Cut into rounds with a biscuit cutter or glass and transfer to an ungreased baking sheet with the edges of the rounds touching. Gather up the scrapes of the dough, roll them out, and repeat. Bake until the biscuits are golden brown, 12-15 minutes. Serve hot or warm.