Uncategorized

Etiquette–Bread and Butter

A few weeks ago, we went to a banquet at a country club.  I found myself needing a refresher on what to do with my roll and butter.  So here’s the skinny on bread and butter.

Before eating, you should break the bread into moderate sized pieces with your fingers.  Then you can butter the bread one piece at a time.  There were some differing opinions on whether you should hold the piece of bread when buttering or hold it against your plate, not in your hand.  The most prevailing opinions said to hold the bread in your fingers.  Toast and hot biscuit halves can be buttered all at once since they taste the best when the butter is melted.

If the butter is in the center of the table with a butter knife provided, you should transfer the amount you want to use to your bread plate, or to the side of your dinner plate if there isn’t a bread plate.  If no utensil is provided, individuals may use their own clean knives or forks.

When butter is served as individually wrapped squares, leave the empty wrappers on your bread plate or tucked under the edge of your dinner plate if you don’t have a bread plate. 

Uncategorized

Granola


My mother-in-law has some delicious recipes that have become part of our family tradition.  One of these is homemade granola.

A few quality ingredients make for a great breakfast treat.  Grape-Nuts Flakes is one of the more difficult ingredients to find, but well worth the effort!

Mix all of the dry ingredients in a big bowl. 

Add the butter and honey melted together.

Stir until well mixed.

Place on two cookie sheets.  I put the both in the oven at the same time and switch the shelves half way through.  Stir occasionally while in the oven.

It’s also a good idea to stir the granola while it cools.  It will harden into a big chunk that you’ll have to break apart if you don’t.


Granola

From the Kitchen of Lorinda Hymas

Ingredients

·         9 c. rolled oats

·         3 c. Grape Nuts Flakes

·         3 c. shredded coconut

·         1 c. wheat germ (optional)

·         1 c. brown sugar

·         1 c. melted butter

·         1 c. honey

·         1 c. raw sunflower seeds

·         3 c. chopped nuts

Directions

Mix dry ingredients together.  Melt honey and butter together.  Pour over dry ingredients and stir until well mixed.  Bake at 325° F for 20-30 minutes.  Stir 1-2 times.  (Less cook time=more chewy).  Remove from oven and allow to cool.  Stir while cooling to keep the granola broken up into individual flakes.

Uncategorized

Tuesday Tips-Weigh Your Flour

This is the first of a series of Tuesday’s Tip of the Week.  Today’s tip is weigh your flour.  When baking, getting the right amount of flour in a recipe can be tricky.  Usually, you add the minimum amount of flour a recipe calls for and then add more, a little at a time, in order to get the right texture. 

Remember in Home Ec in school, your teacher would have you sift the flour before adding it to the recipe.   For me, it was way more effort that it was worth because I thought it was a texture thing.  Turns out that it is a volume thing. The more packed a cup of flour, the more flour you get per cup.  So, when using volume to measure, you can get widely varying amounts of flour in a recipe.  Sifting the flour first gives you a more consistent volume of measure.  However, I think there is yet a better and easier way.

A few years ago, we purchased a kitchen scale, and I started weighing our flour.  Turns out that weight is a far more consistent way to measure flour.  The conversion factor for flour should be:

1 cup flour = 4.92 ounces

Not all recipes are created equal, and you may have to play around a bit with the recipe to get the correct weight of flour, but the conversion factor is a great place to start.  Once I figure out the correct weight of the flour for a recipe, it takes out all the guess work.  I just add the correct weight of flour and the recipe turns out every time.  I don’t need to tweak anything.  It is definitely a time saver, and my recipes turn out more consistently each time.

Uncategorized

Etiquette-Napkins

Etiquette is a way to show respect for others.  It’s not a way to put on airs or think you are better than others. A few years ago, I bought a reference book called Emily Post’s Etiquette.  It covers various topics on etiquette that range from weddings, travel, communication, and of course, table manners.
  

As a family, we’ve decided we’d like to start focusing on a different aspect of table manners each week, and as an added incentive for us, I thought I’d start sharing our focus here. 

This week’s topic is using your napkin.  In a place setting, the napkin is placed to the left of the forks, under the forks, or in the center of the dinner plate.  It can be either folded or with a napkin ring around it.

Your napkin should go into your lap as soon as you sit down.  In more formal settings, you may wait until your hostess puts her napkin in her lap.  Don’t tuck the napkin under your chin or in your belt.  The napkin should stay folded in half.

You should use the napkin frequently during the meal to blot your lips.  Do not wipe.  When you get up or when the meal is over, you should put your napkin to the left side of your plate with loose folds.  If your plate has been removed, you can place it in the middle of the place setting.

Uncategorized

Pasta Salad


This pasta salad is my go to when I have to bring a salad to an event or when I’ve having a luncheon.  It’s simple, but it goes a long way and is full of flavor.

Feta is  the most flavorful cheese for this dish.  I especially like the kind that comes in a chunk in brine.  Cheddar will also work.  Olive Garden’s Italian Dressing is delicious in this, but if you want to make your own, Our Best Bites has a great recipe for Italian Dressing.

While your pasta is cooking, cut up your broccoli.  The smaller the florets, the better your salad will be.

 Rinsing the pasta after it’s drained helps to cool it down quickly and to get rid of the startch.

At this point, throw everything into a bowl and toss it together.

Pasta Salad

From the Kitchen of and Recipe by Lynnae Hymas

Ingredients:

3 quarts water

2 teaspoons salt

6 oz. Tri-color Rotini Pasta

1 small head of broccoli

15-20 pieces of pepperoni

3-4 ounces Feta cheese

1 cup Italian dressing

Boil the water and add the salt.  Add the pasta to the boiling water.  Cook for 8-10 minutes.  Drain the pasta in a strainer and rinse with cold water.  Cut the broccoli into small bite sized florets and discard the stems.  Add pasta and broccoli to a salad bowl, along with pepperoni, and crumbled Feta cheese.  Pour the Italian dressing over the top and toss together.  Serves 8-12.  
Uncategorized

Chicago Style Deep Dish Pizza

 
 A couple of years ago, I went to Chicago for the first time on a girl’s trip with my daughter, sister-in-law, Katie, her mom, and my niece.  One of the first things we did was go to Giordano’s and Lou Malnati’s (Giordano’s is my favorite).  I’d never tasted Chicago style deep dish pizza before, and I thought I’d died and gone to heaven.  If you haven’t tried it before, it’s kind of an upside pizza with a flaky crust.  Trust me, it’s good!

While there are a few pizzerias outside of Chicago where you can get the stuff, I wanted to recreate the experience at home.  I found a recipe on carnaldish.com, which totally fits the bill.

The crust is not a normal pizza crust.  It includes corn meal and you fold in a layer of butter to give it a flaky texture.

Roll out the dough and spread a layer of soft butter on top

Roll it up like a cinnamon roll

Cut the roll in half, and fold in thirds to make a ball

The sauce is made caramelized onions, and slow simmered crushed tomatoes.

Use a 9″ cake pan, grease with olive oil, and line the pan with the rolled out dough.  Then, first put down the cheese, then the toppings, then the sauce.  Bake.  Serve.  YUM!

Whatever toppings you like on pizza
Toppings before sauce!

About to go in the oven

Hot out of the oven

Chicago Style Deep Dish Pizza
From the Kitchen of Lynnae Hymas

Recipe adapted from Carnal Dish

Ingredients

For the dough:

  • 3¼ cups (16¼ ounces) bread flour
  • ½ cup (2¾ ounces) yellow cornmeal
  • 1½ teaspoon table salt
  • 2 teaspoons sugar
  • 2 teaspoons instant or rapid-rise yeast
  • 1¼ cups water (10 ounces), room temperature
  • 3 tablespoons unsalted butter , melted, plus 4 tablespoons, softened
  • 1 teaspoon plus 4 tablespoons olive oil

Sauce:

  • 2 tablespoons unsalted butter
  • ¼ cup grated onion
  • ¼ teaspoon dried oregano
  • Dash of crushed red pepper
  • ½ teaspoon salt
  • 3 garlic cloves, minced or pressed through garlic press (about 2 teaspoons)
  • 1 (28 ounce) can crushed tomatoes
  • ¼ teaspoon sugar
  • 2 teaspoons dried basil
  • 1 tablespoon extra-virgin olive oil
  • Ground black pepper

Toppings:

  • 1 pound whole-milk or part-skim mozzarella cheese, shredded (about 4 cups) (see note below)
  • ½ ounce grated Parmesan cheese (about ¼ cup)
  • Your favorite pizza toppings (sausage, ham, pepperoni, bacon, pineapple, etc.)

Directions

FOR THE DOUGH:

  1. In the bowl of a stand mixer, mix the flour, cornmeal, salt, sugar and yeast together until incorporated. Using the dough hook attachment, add the water and melted butter and mix on low speed until fully combined.  Scrape the sides and bottom of the bowl occasionally.  Knead until the dough is smooth and pulls away from the sides of the bowl.
  2. Coat a large bowl with 1 teaspoon of olive oil and transfer the dough to the bowl, turning once to oil the top. Cover tightly with plastic wrap and let rise at room temperature until it’s nearly doubled in size, about 45-75 minutes.

FOR THE SAUCE:

  1. Heat butter in a medium saucepan over medium heat until melted. Then add the onion,  oregano, crushed red pepper and ½ teaspoon of salt, cooking and stirring occasionally until liquid has evaporated and onion is golden.  Add the garlic and stir fry for 30 seconds. Add the tomatoes and sugar and bring to a simmer over high heat.  Lower the heat to medium and simmer until the sauce has reduced to 2½ cups. Remove the sauce from the stove and stir in basil and oil. Season with salt and pepper to taste.

TO LAMINATE THE DOUGH:

  1. Spray your work surface with non-stick cooking spray and turn the dough out onto the work surface.  Roll it into a rectangular shape about 1/4-inch thick.  Spread the softened butter over the dough but leave a ½-inch border along the edges.  Roll the dough into a tight cylinder (like a cinnamon roll).  Cut the roll in half and fold the half into thirds, pinching the seams together to form a ball. Repeat with the other half.  Place both dough balls into an oiled bowl and cover tightly with plastic wrap. Let the dough balls rise in the refrigerator until doubled in size, about 45-60 minutes.
  2. Heat the oven to 425°.  Oil two 9-inch round cake pans with about 2 tablespoons of olive oil each. Place 1 dough ball on a dry work surface and roll out into a 13-inch circle, about ¼-inch thick. Transfer the dough to the cake pan.  Press the dough into the pan lightly, working up the sides. Repeat with the other dough half.
  3. Sprinkle 2 cups of mozzarella over the dough for each pizza.  Place your toppings on top of the cheese (if using sausage, you can leave it raw, but make sure to bake for at least 30 minutes). Spread half of the tomato sauce on top of each pizza, then sprinkle 2 tablespoons of parmesan over the sauce. Bake until the crust is golden brown, about 25-35 minutes. Remove the pizza from the oven to rest for 5-10 minutes.
  4. Slice, serve and enjoy!

PDF Printable File

Uncategorized

Creamy Basil Chicken

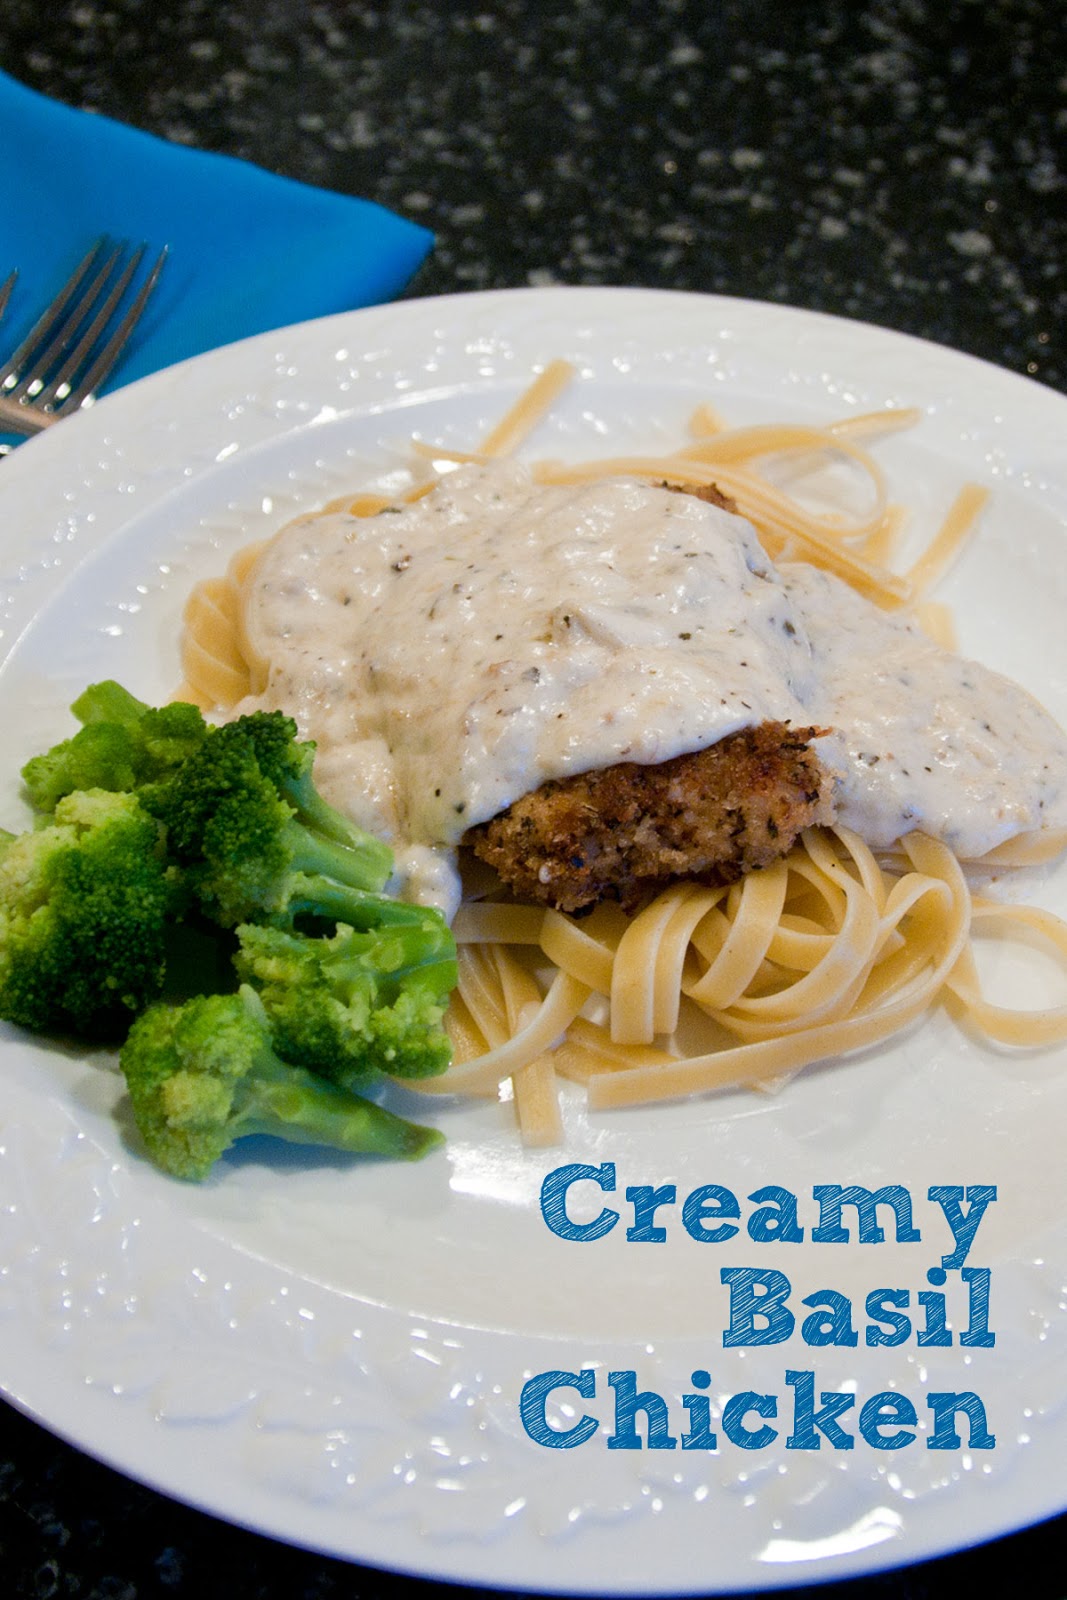
Creamy Basil Chicken is a family favorite around here.  It is frequently requested, always goes fast, and there are never left overs.  My oldest even made it once for a cook-off with some of his friends.

I actually buy my chicken breasts in bulk, as in 40 lbs at a time.  It takes a while to trim, cut, and bag it, but it’s a time saver when I’m cooking dinner.  I cut some of it into chunks, flatten some of it, and just bag the rest.  This is some that I’ve already flattened along with the other ingredients to make this meal delicious.  I think the McCormick Red Pepper and Roasted Garlic Seasoning is one of the secret ingredients that makes this dish rock!

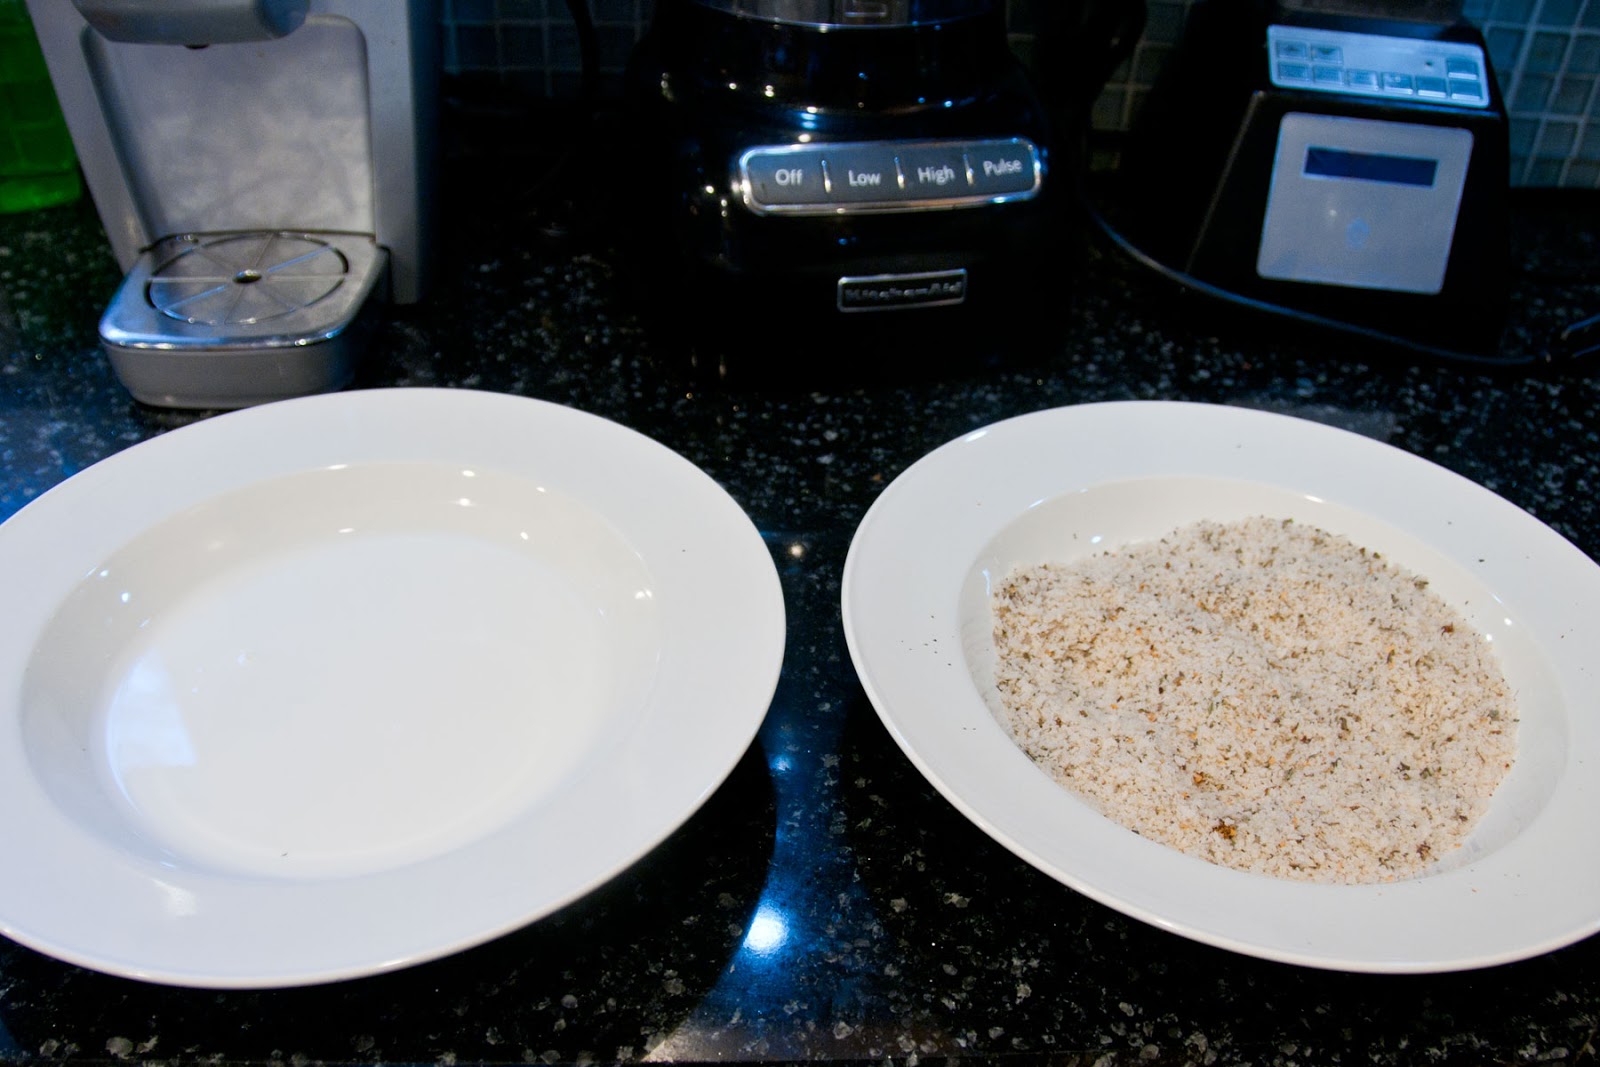
Just use two shallow bowls for the milk and bread crumb mixture.  I go straight from the bread crumbs to the frying pan.

I find it works best to brown one side of the chicken in 2 Tbs. melted butter, pull the chicken from the pan, melt 2 Tbs. of butter, and brown the other side of the chicken.

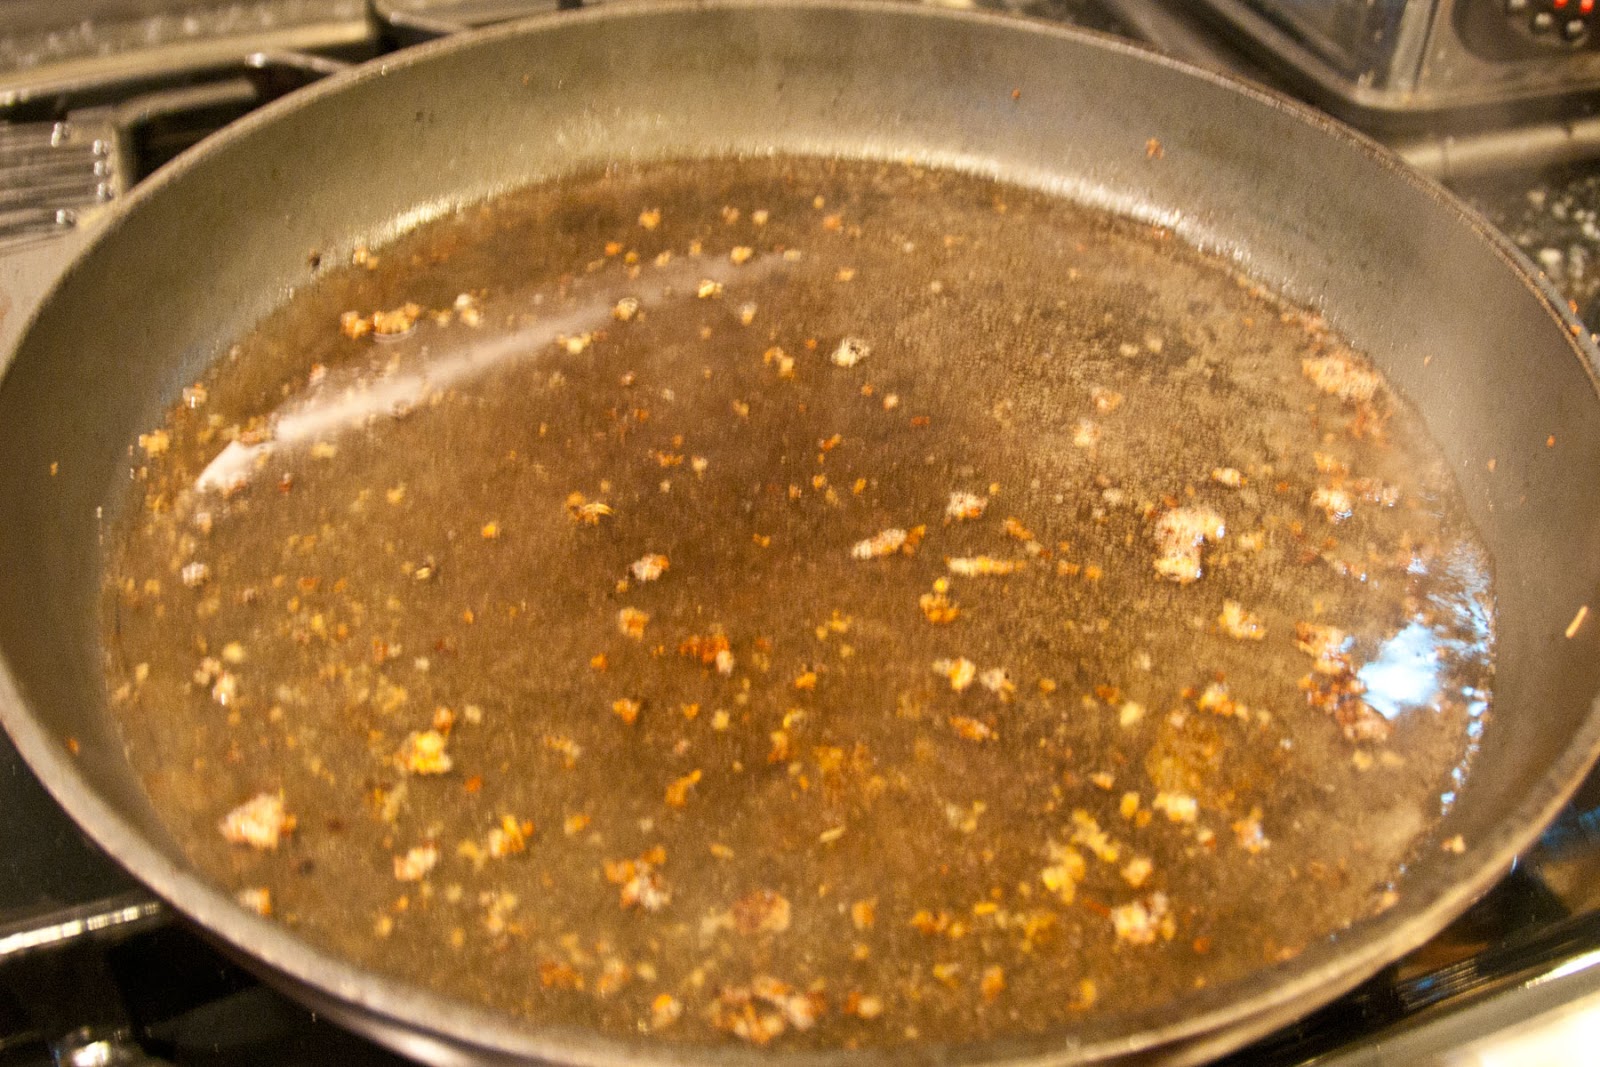
When the chicken is browned, pull it out and bake it in the oven, then add the chicken broth directly to the pan to soak up all those delicious flavors.

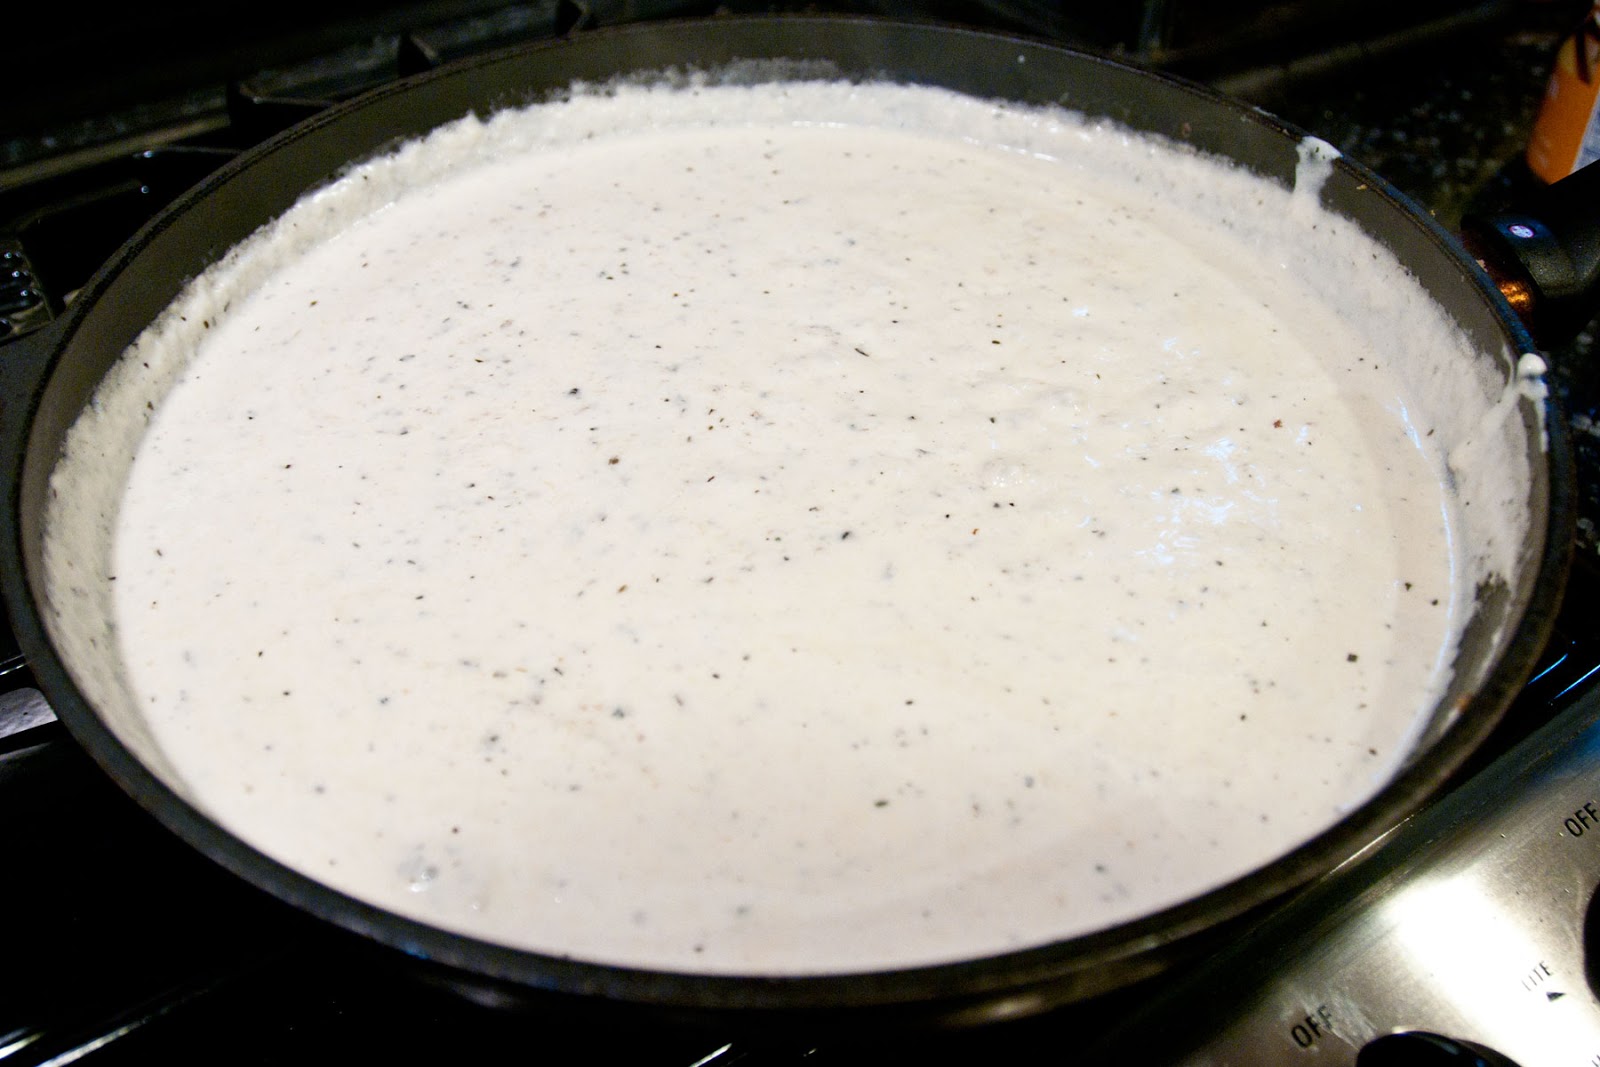
After adding the sauce ingredients, including the Parmesean cheese, I thicken it with a corn starch surrey.

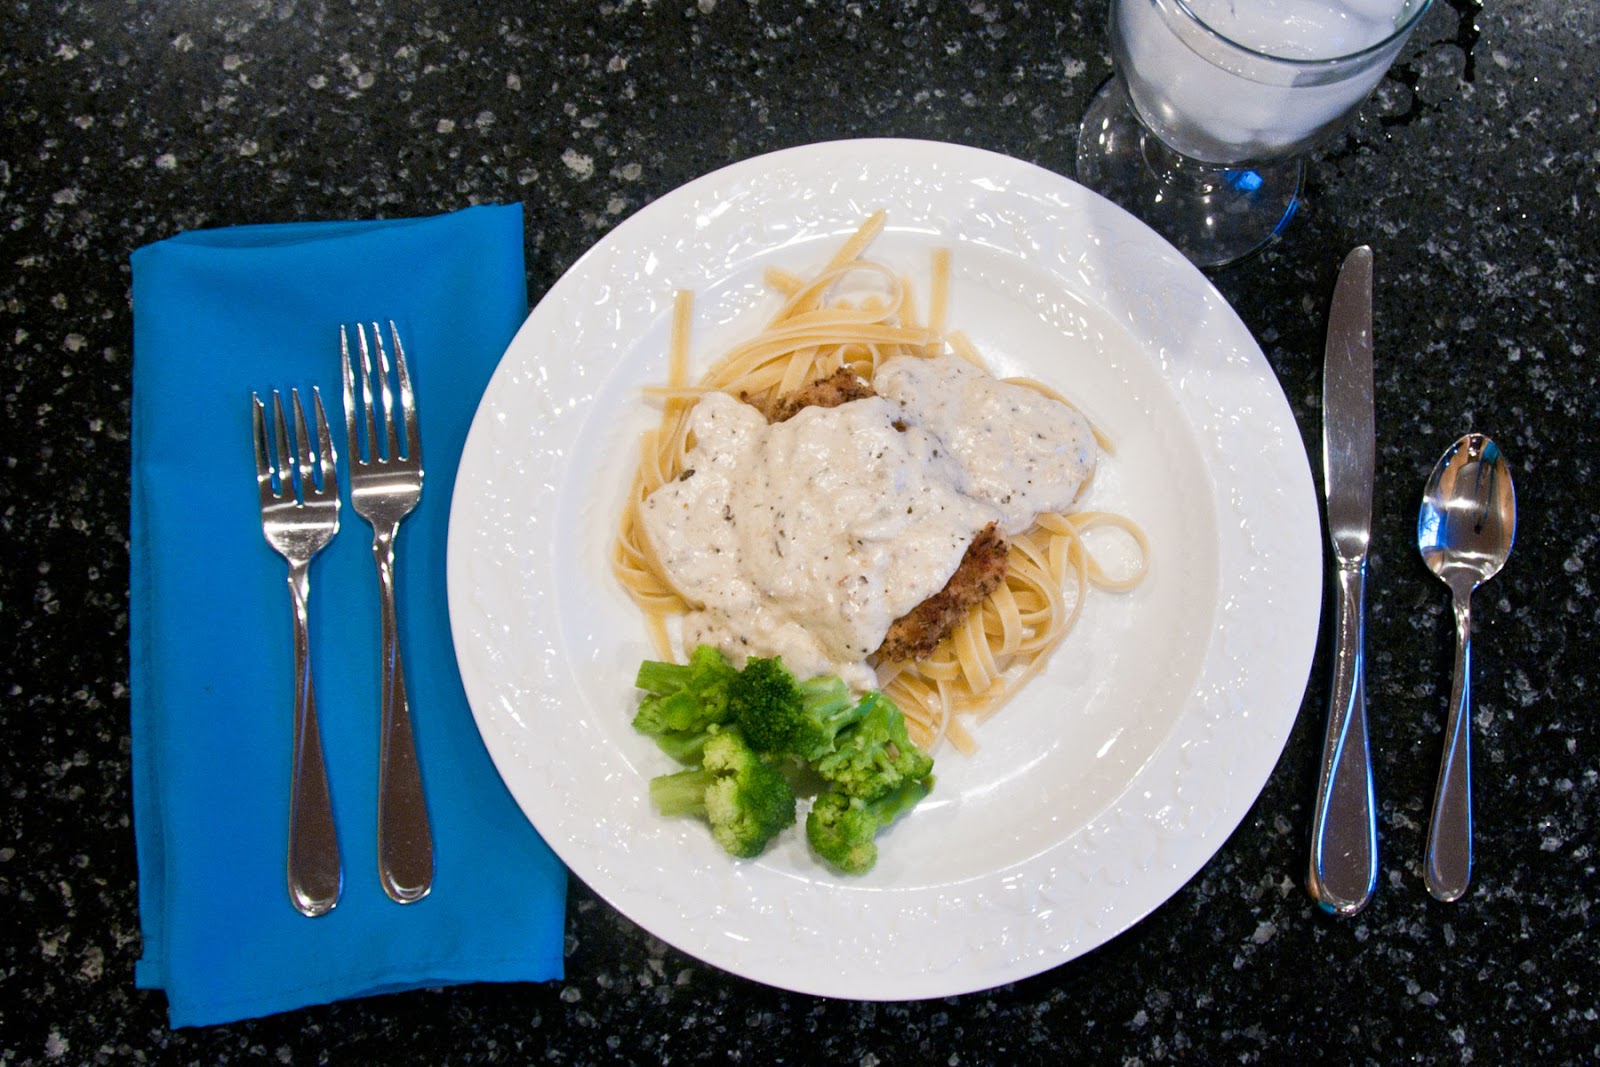
Pull the chicken from the oven and serve it all over a bed of your favorite pasta.  I like fettuccine best!

 Creamy Basil Chicken

From the Kitchen of and Recipe by Lynnae Hymas
Ingredients

  •          1 c. milk
  •          3 large chicken breasts
  •          4 Tbs. butter

Breading

  •          1 c. Panko bread crumbs
  •          1 Tbs. basil
  •          1 tsp. garlic salt
  •          1 tsp. McCormick Red Pepper and Roasted Garlic Seasoning
Sauce
  •          1 c. chicken broth
  •          2 c. heavy cream
  •          1 tsp. basil
  •          1 tsp. salt
  •          ½ tsp. pepper
  •          1 c. freshly grated Parmesan cheese
  •          2 Tbs. corn starch
  •          4 Tbs. cold water
Directions
Cut each chicken breast in half crosswise.  Cover with plastic wrap.  Using a meat tenderizer, pound each chicken breast until it’s about a ½ inch thick.  Set aside.
Mix together the Panko bread crumbs, 1 Tbs. basil, garlic salt, and McCormick Red Pepper and Roasted Garlic Seasoning in a shallow bowl.  Pour milk into another shallow bowl.  Dip chicken in the milk and then the breading mixture.  In a large frying pan over medium heat, melt 2 Tbs. butter.  Add the chicken to the pan and brown one side.  Remove the chicken from the pan and melt the other 2 Tbs. of butter.  Brown the other side of the chicken.  Remove from the pan and put in a 9×13 pan. Bake at 350 degrees for 20-30 minutes.   
Sauce:  Deglaze the pan with the chicken broth.  Add the cream, basil, salt, and pepper.  Add 1 cup of grated Parmesan cheese and stir until melted.  Mix the corn starch and water together in a separate bowl.  Add a little at a time to the sauce and stir until desired thickness is reached.  Place chicken on your favorite pasta and then cover with sauce.

PDF printable file